
We love any excuse to dress up in our house, so Halloween is always a time of great excitement. We have always preferred to throw a Halloween themed party rather than taking part in the usual guising and with Covid-19 and lockdown (2020) celebrations were going to be on a smaller scale. We decided to have our own family Halloween party and to try out sensory ideas, games and party food that we could use again in the future.

Here is a link to the Pinterest board I made specifically for Halloween ideas.
Decorations and Crafts
Cottonwool Ball Printing Ghost picture – resources: black paper (paper painted black), white/coloured paint, cotton wool balls, black pen, googly eyes, glue.
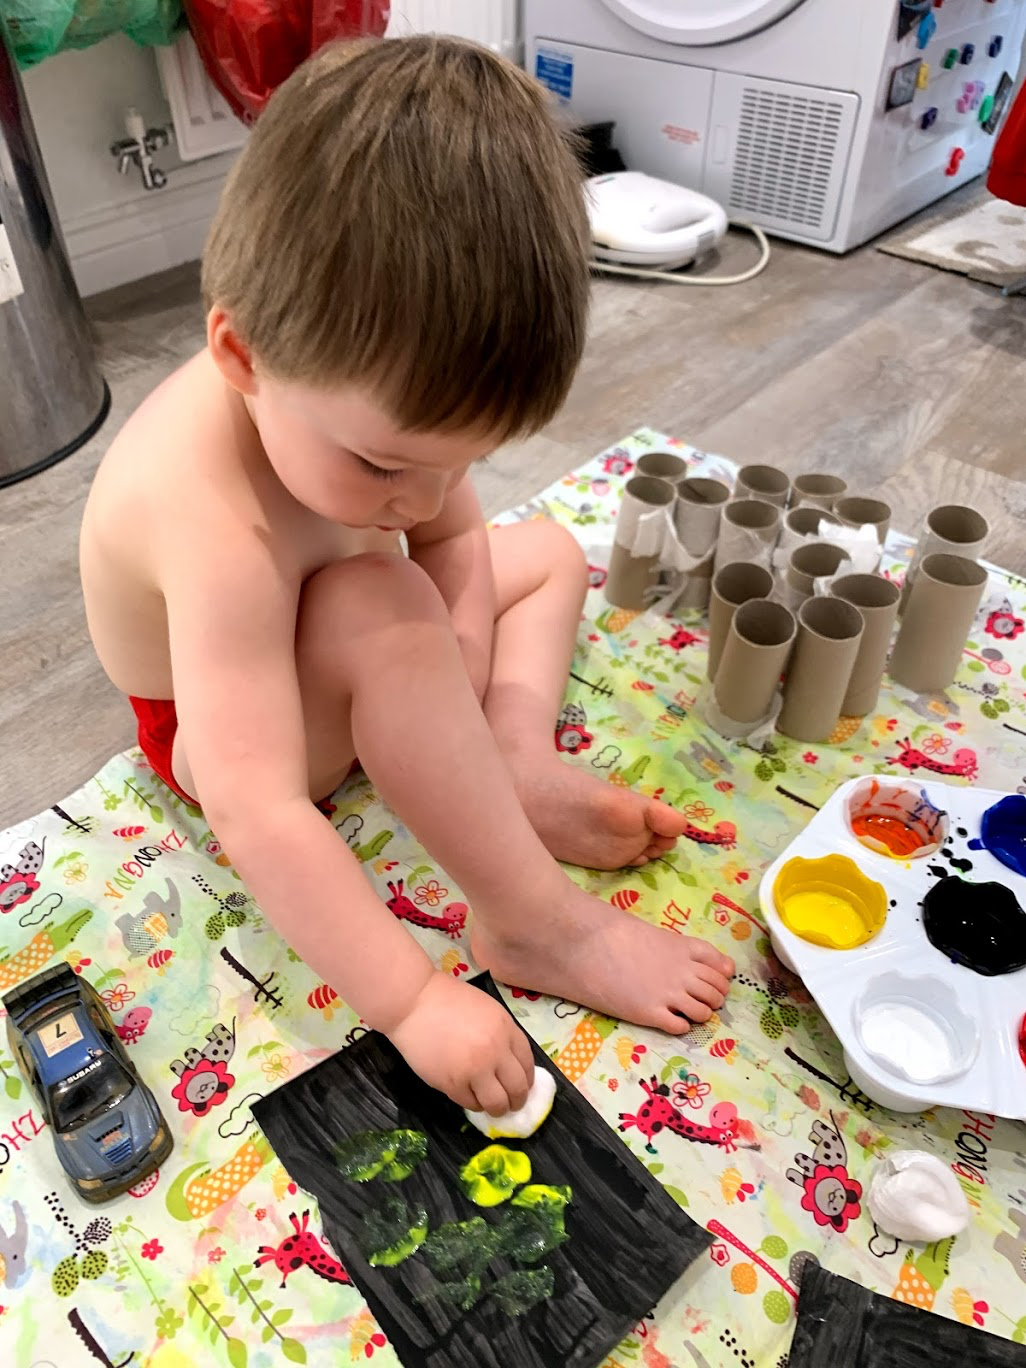
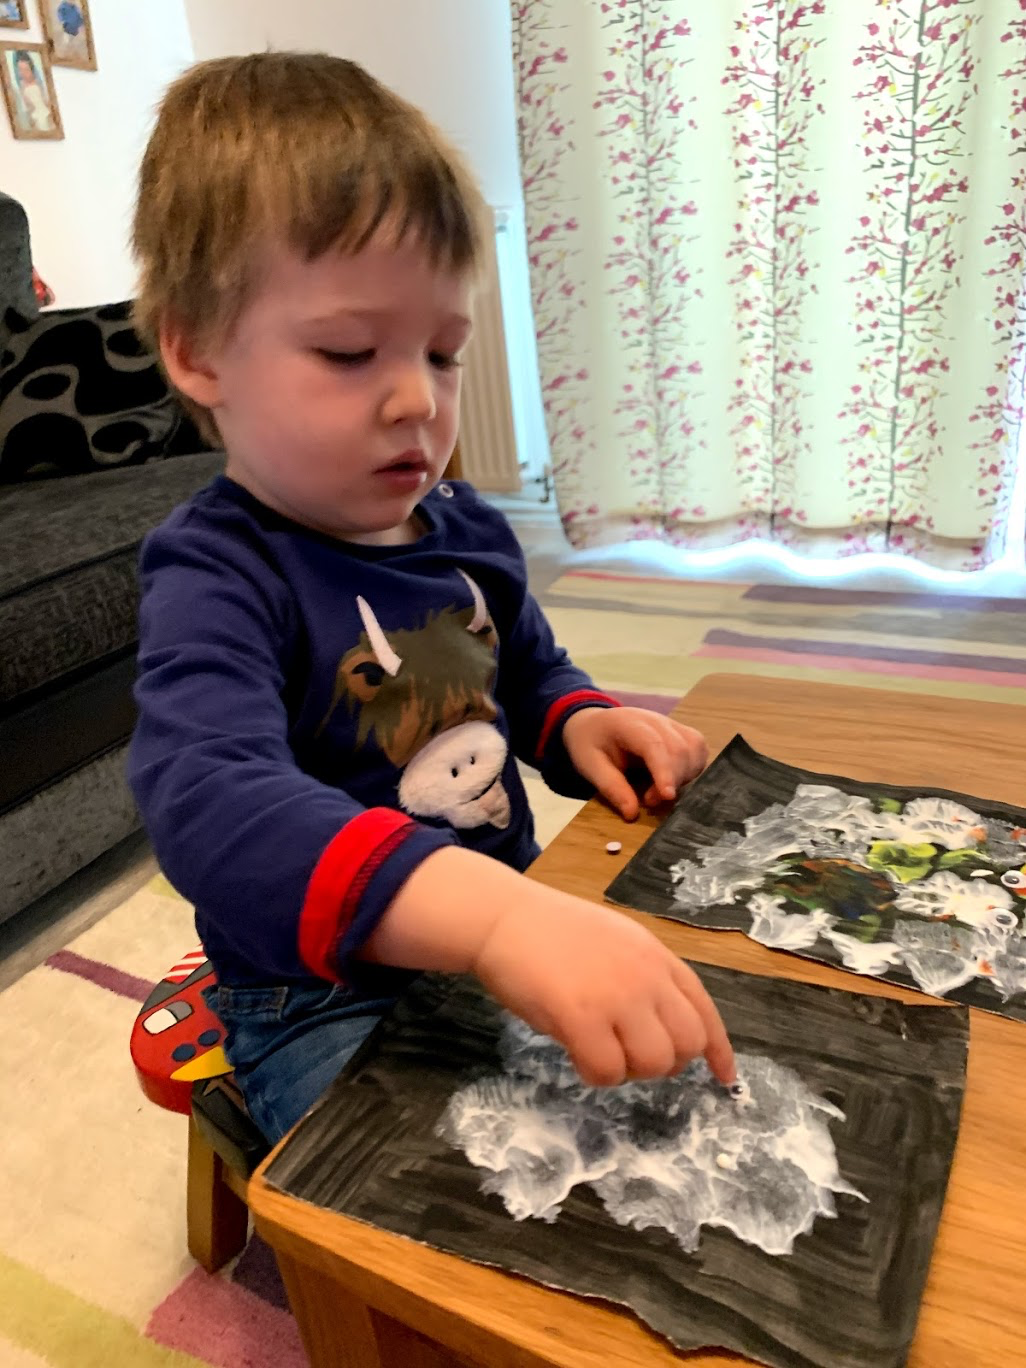
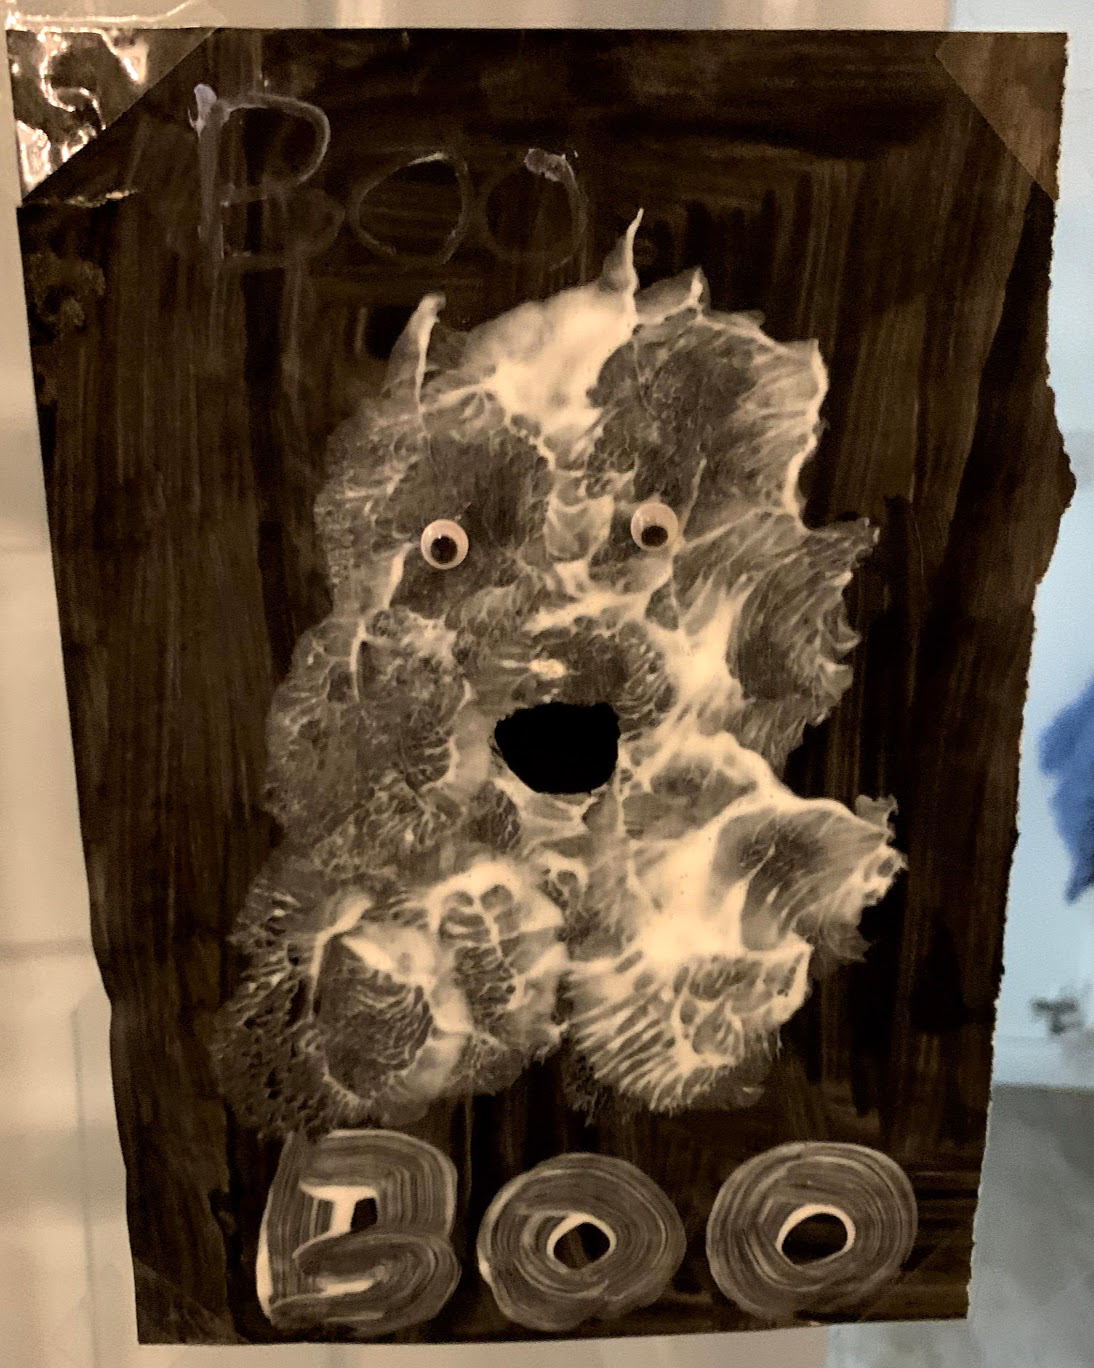
I painted a piece of A4 paper black as we didn’t have any black paper. Once it was dry Robbie dipped a cottonwool ball into some paint and stamped this onto the black paper to make a ghost shape. We stuck googly eyes on after the paint was dry.
Toilet Tube Spiders – resources: toilet tubes, black paint, scissors, googly eyes, glue.

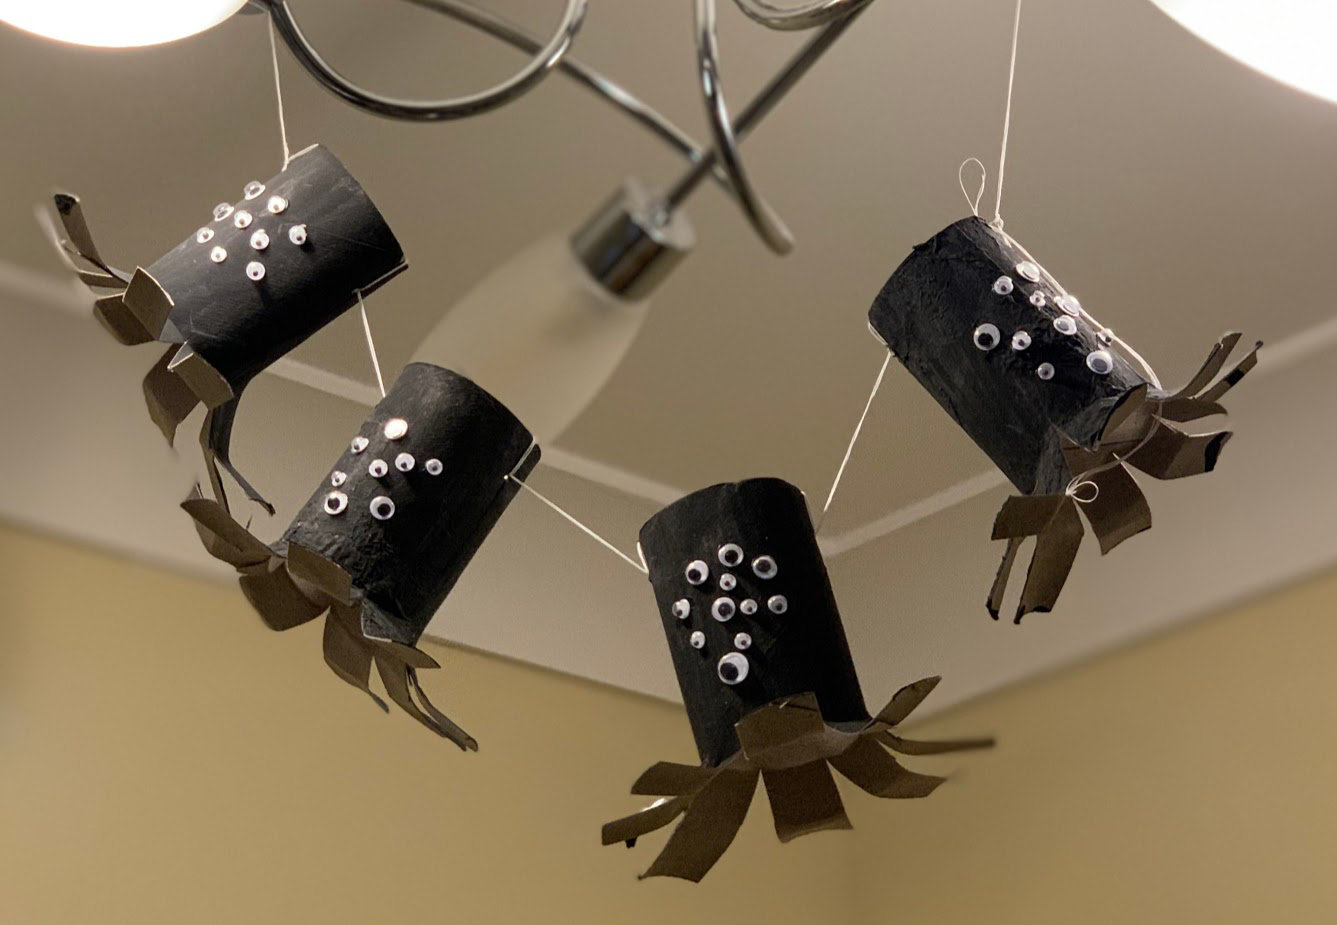
We painted toilet roll tubes black, then cut the bottom into 8 sections and bent them up to look like legs. We stuck lots of googly eyes on and hung them on a piece of string to make a Halloween decoration.
Toilet Tube Bats – resources: toilet tubes, black and white paint, scissors, googly eyes, glue, cardboard.
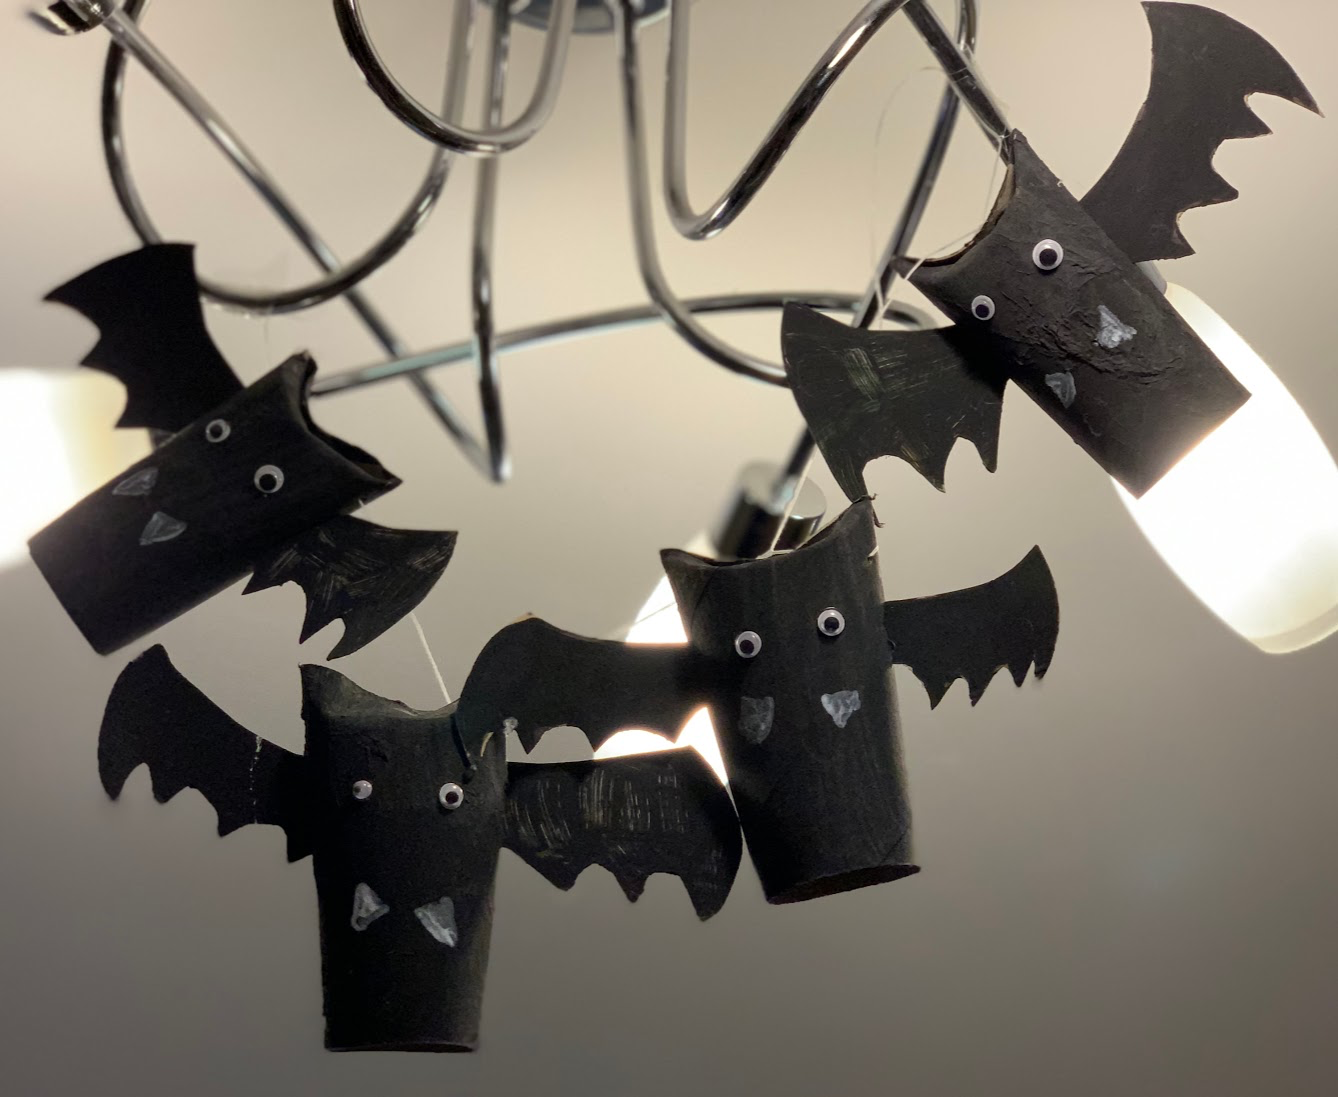
After painting toilet roll tubes black we folded the top down to make ear shapes, painted on white fangs and stuck on googly eyes. We then drew wing shapes onto a piece of cardboard – making sure that one end was quite long and thin, painted them and cut them out. To attach the wings to the bats I cut a small slit into each side of the toilet tube and slid the long thin end into the slit. we hung these on some string to make a Halloween decoration.
Toilet Tube Frankensteins – resources: toilet tubes, black and green paint, googly eyes, glue, black pen, cardboard.
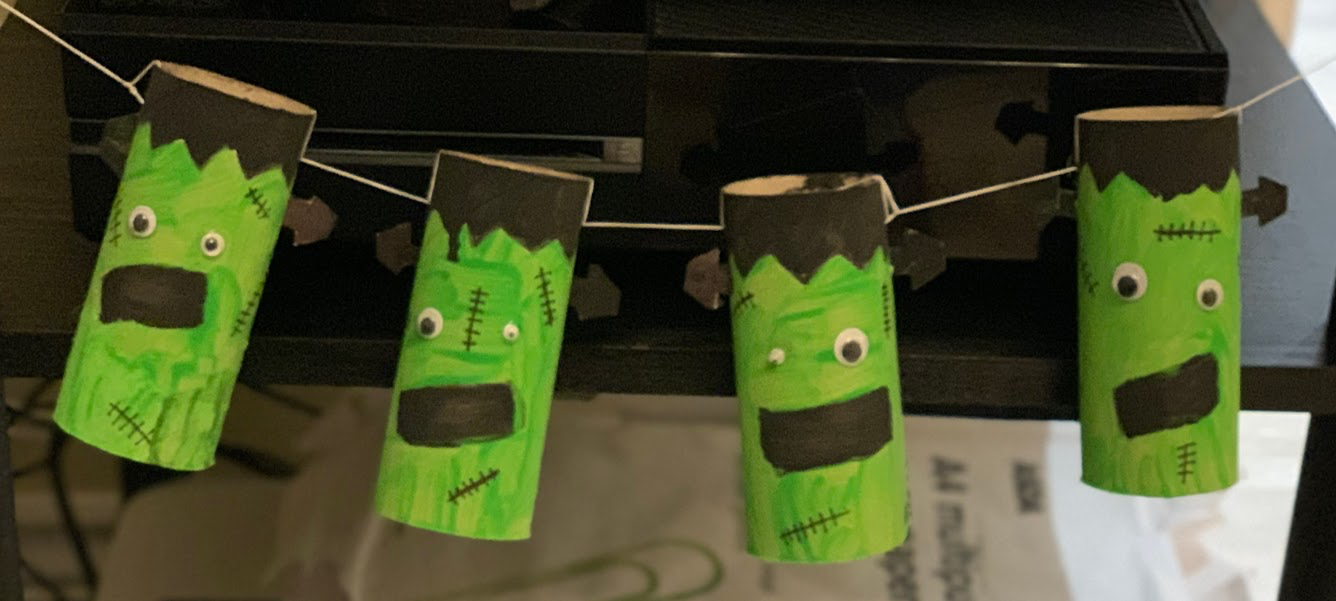
We painted the tubes green for the face and black for the hair and mouth. Once they were dry we drew on the scars with a black pen and stuck on some googly eyes. We hung them on some string to make a Halloween decoration.
Toilet Tube Mummys – resources: toilet tubes, black and grey paint, tissues, googly eyes, glue.
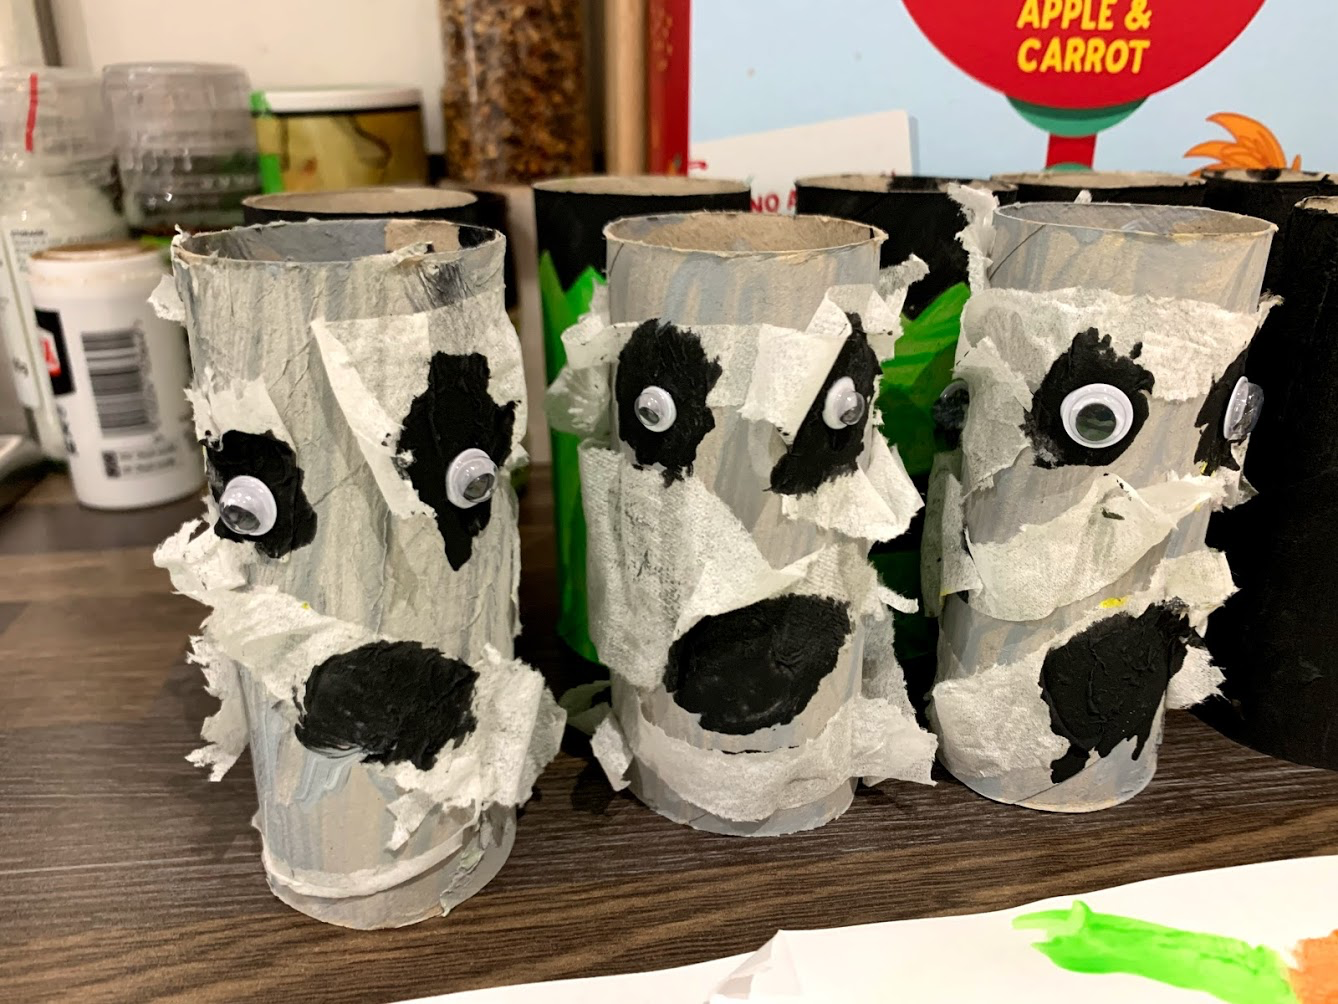
We painted the toilet tubes grey and while the paint was wet stuck on some ripped up tissue so that this stuck when the paint dried. We painted on eyes and a mouth in black and stuck on gooey eyes.
Toilet Tube Pumpkins – resources: toilet tubes, orange paint, black pen, googly eyes, glue.
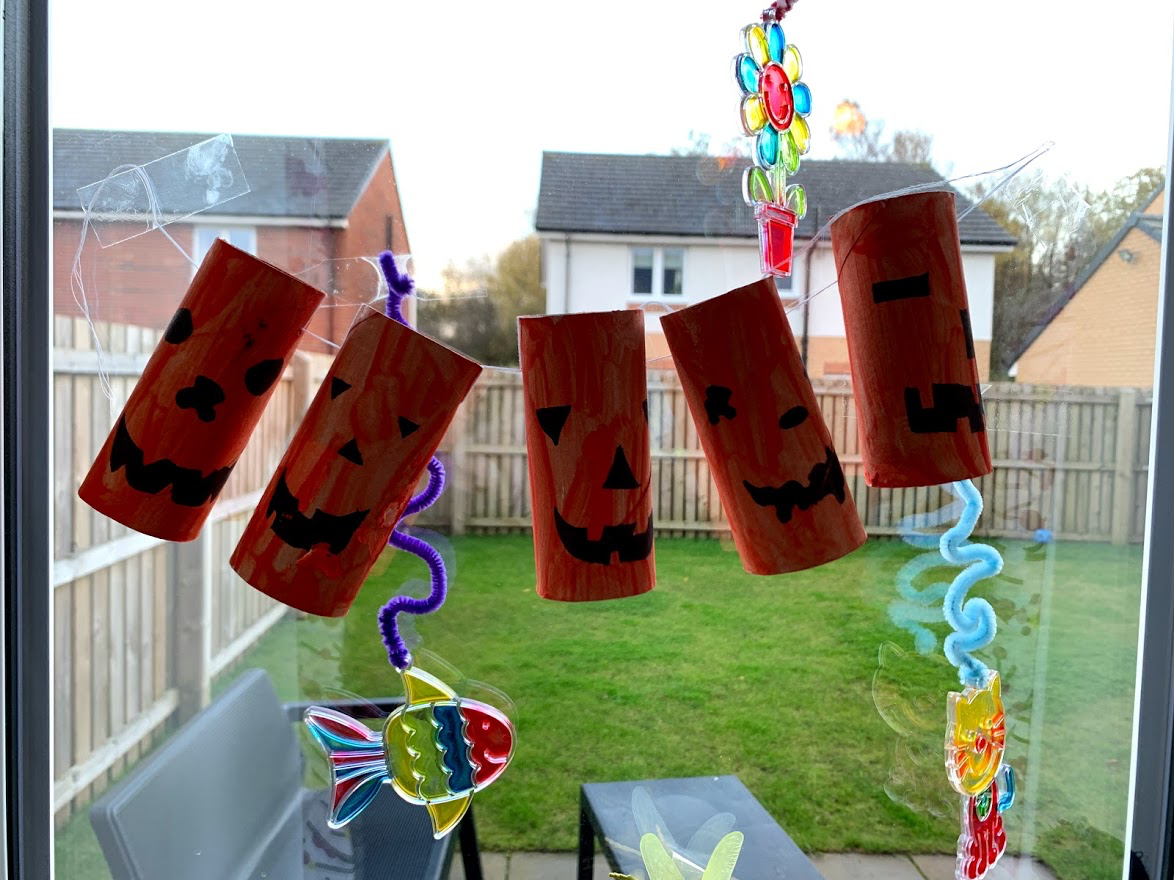
We painted the toilet tubes orange then drew on eyes, noses and mouths with a black pen once they were dry. We strung them together with string to make a Halloween decoration.
Toilet Tube Scary Trees – resources: toilet tubes, black and green paint, scissors.

Robbie decided that he wanted scary Halloween trees as a decoration too so we made these. We painted toilet tubes black and green, then cut the tops into branches and strung them together with string.
Handprint Pumpkins – resources: plain paper, orange and green paint, googly eyes, glue.

We painted Robbie’s hand and thumb orange and his fingers green which he then stamped onto some plain paper. Once they were dry we drew on eyes, a nose and mouth with a black pen and stuck on some googly eyes.
We cut these out and stuck them to some string to create some Halloween bunting.
Handprint Monsters – resources: plain paper, paint, googly eyes, glue.
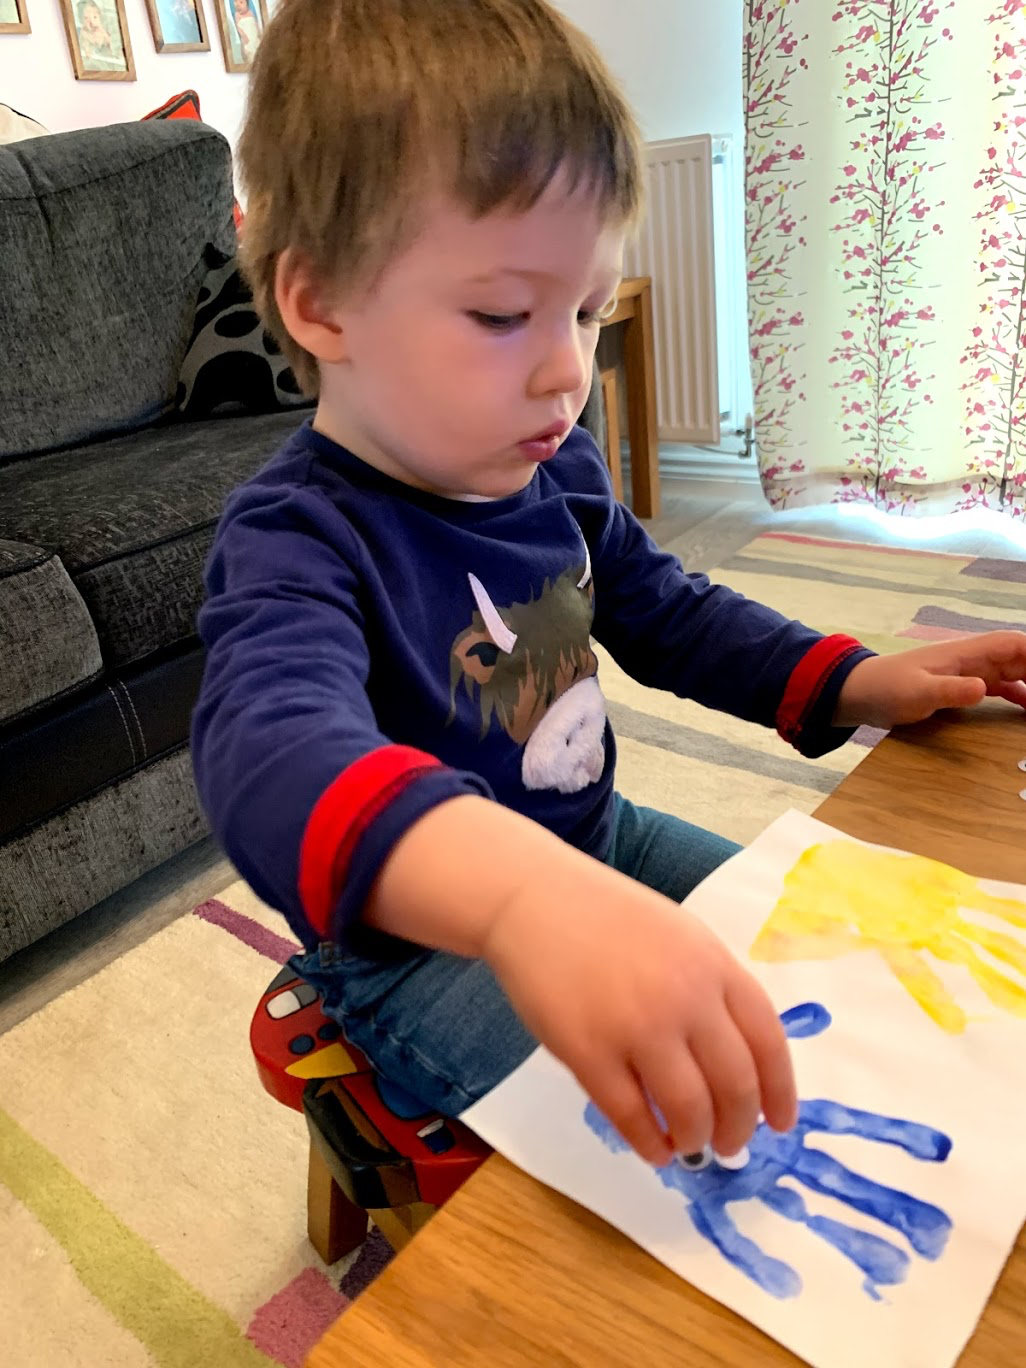
We painted Robbie’s hand different colours which he then stamped onto some plain paper. Once they were dry we stuck on some googly eyes.
We cut these out and stuck them to some string to create some halloween bunting.
Footprint Frankensteins – resources: plain paper, green paint, googly eyes, glue.

We painted Robbie’s foot green which he then stamped onto some plain paper. Once they were dry we drew on a mouth, bolts and scars with a black pen and stuck on some googly eyes.
We cut these out and stuck them to some string to create some halloween bunting.
Footprint Ghost – resources: black paper (paper painted black), white and black paint, googly eyes, glue.
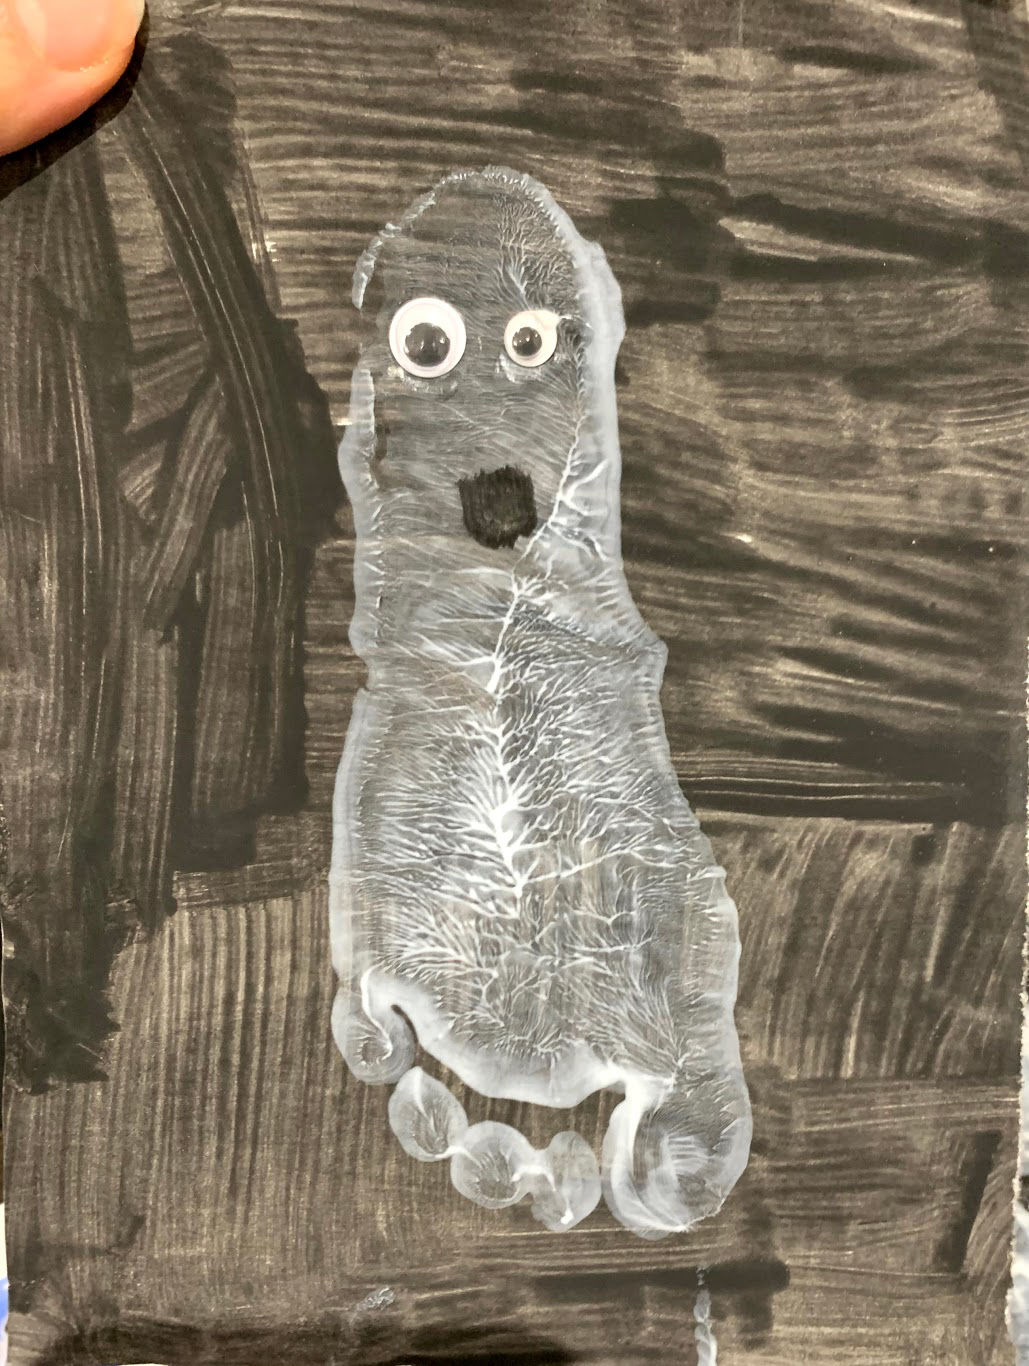
First, we painted some plain paper black as we didn’t have black paper at home. Then we painted Robbie’s foot white and stamped it onto some plain paper. Once dry we drew on a mouth and stuck on some googly eyes.
Apple Printing Pumpkins – resources: plain paper, orange paint, apples cut in half, green crayon, black pen.
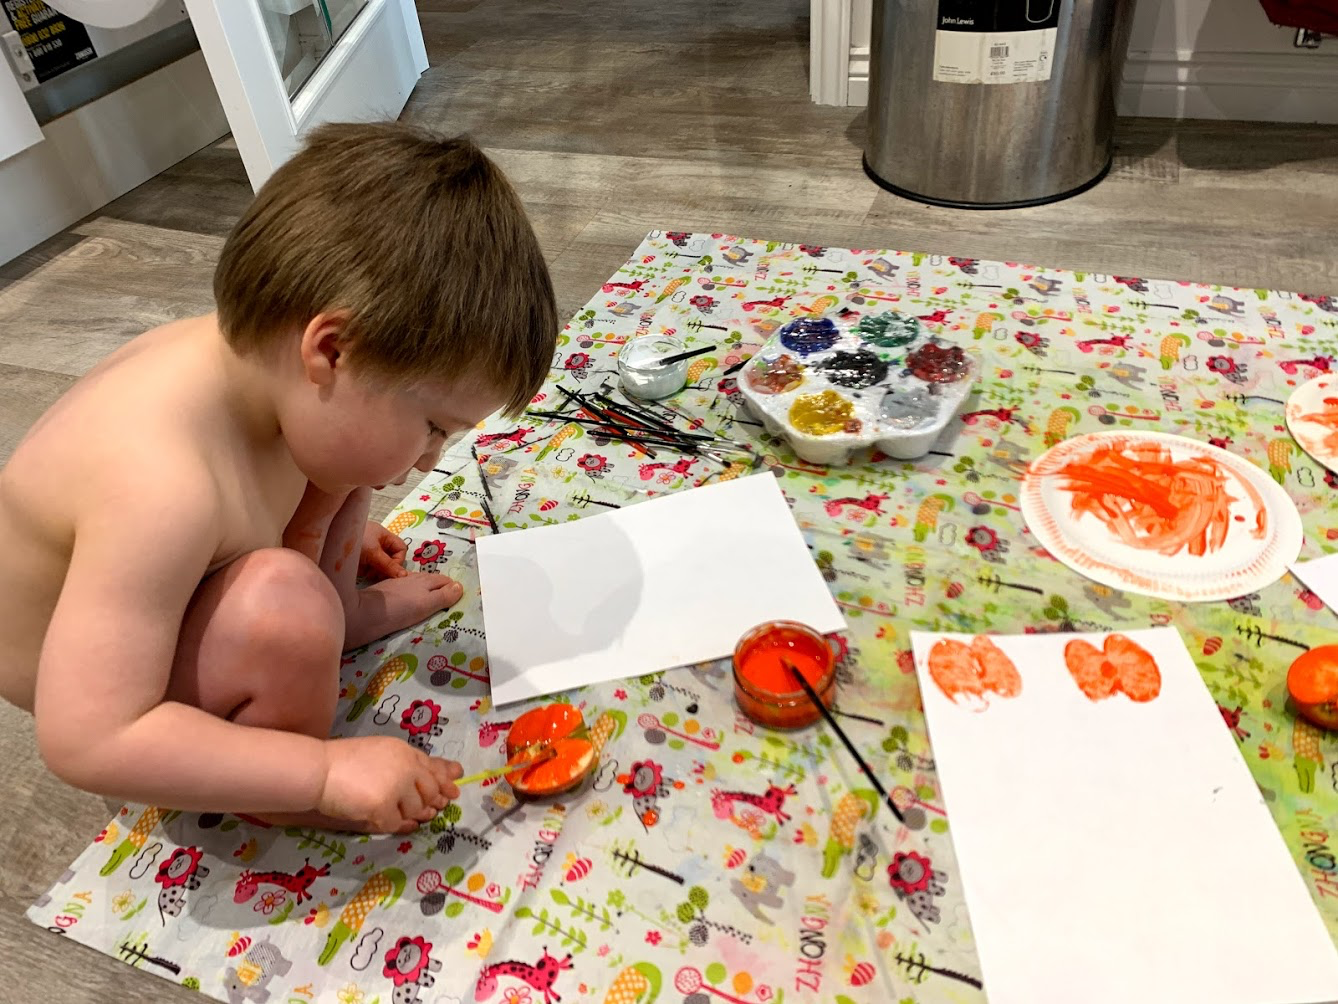
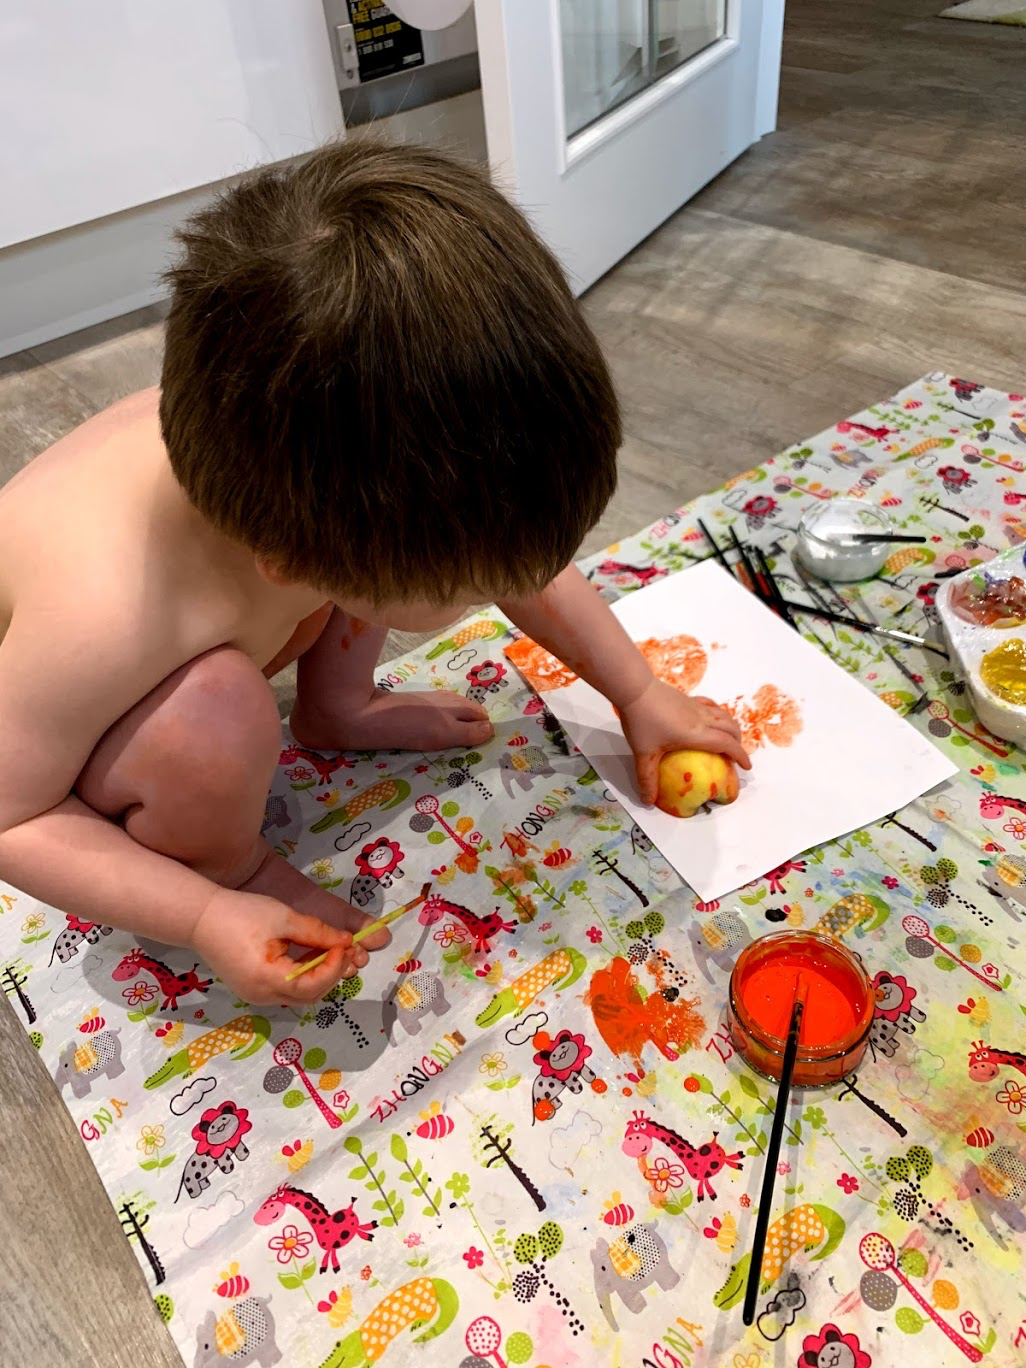
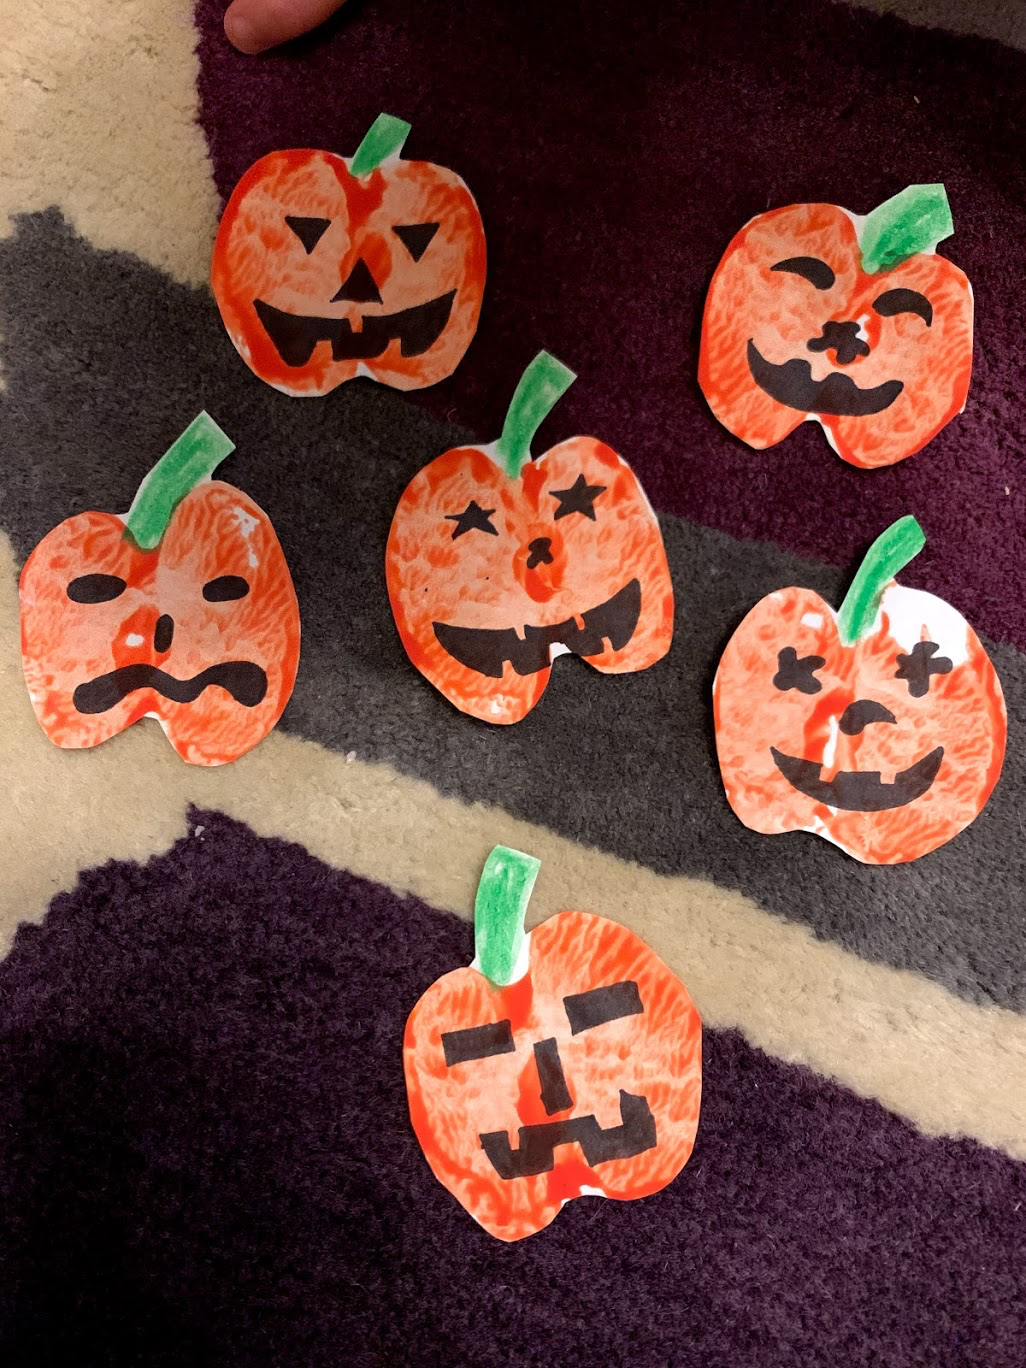
We cut an apple in half and blotted it dry on some kitchen roll. Then we painted the flat side orange and stamped this onto some plain paper. After letting them dry we drew on a stalk using green crayon and eyes, a nose and mouth using a black pen.
We cut these out and used them as Halloween decorations.
“Bloody” Hand and Foot Prints – resources: plain paper, red paint.
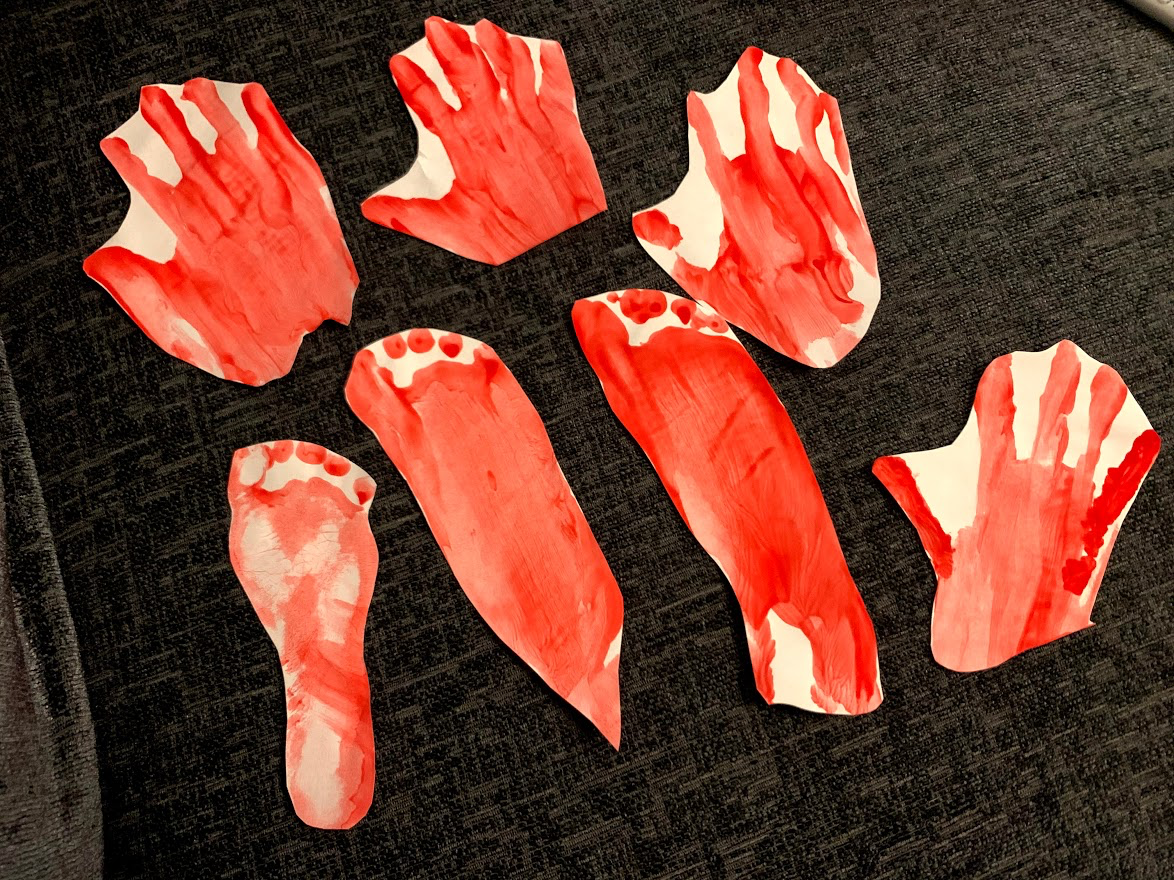
This was such a simple craft but was really effective as Halloween decorations. We painted Robbie’s hands and feet red then stamped them onto a piece of paper and dragged them down a little. Once they were dry we cut them out and stuck them on the walls and doors as Halloween decorations.
Cottonwool Ghost – resources: black paper (paper painted black), glue, cottonwool, googly eyes.

I love this easy craft. We painted some plain paper black (as we didn’t have access to any black paper), then once it was dry we stuck pieces of cotton wool onto the paper in the shape of a ghost. We finally stuck on some googly eyes and pained on a little mouth.
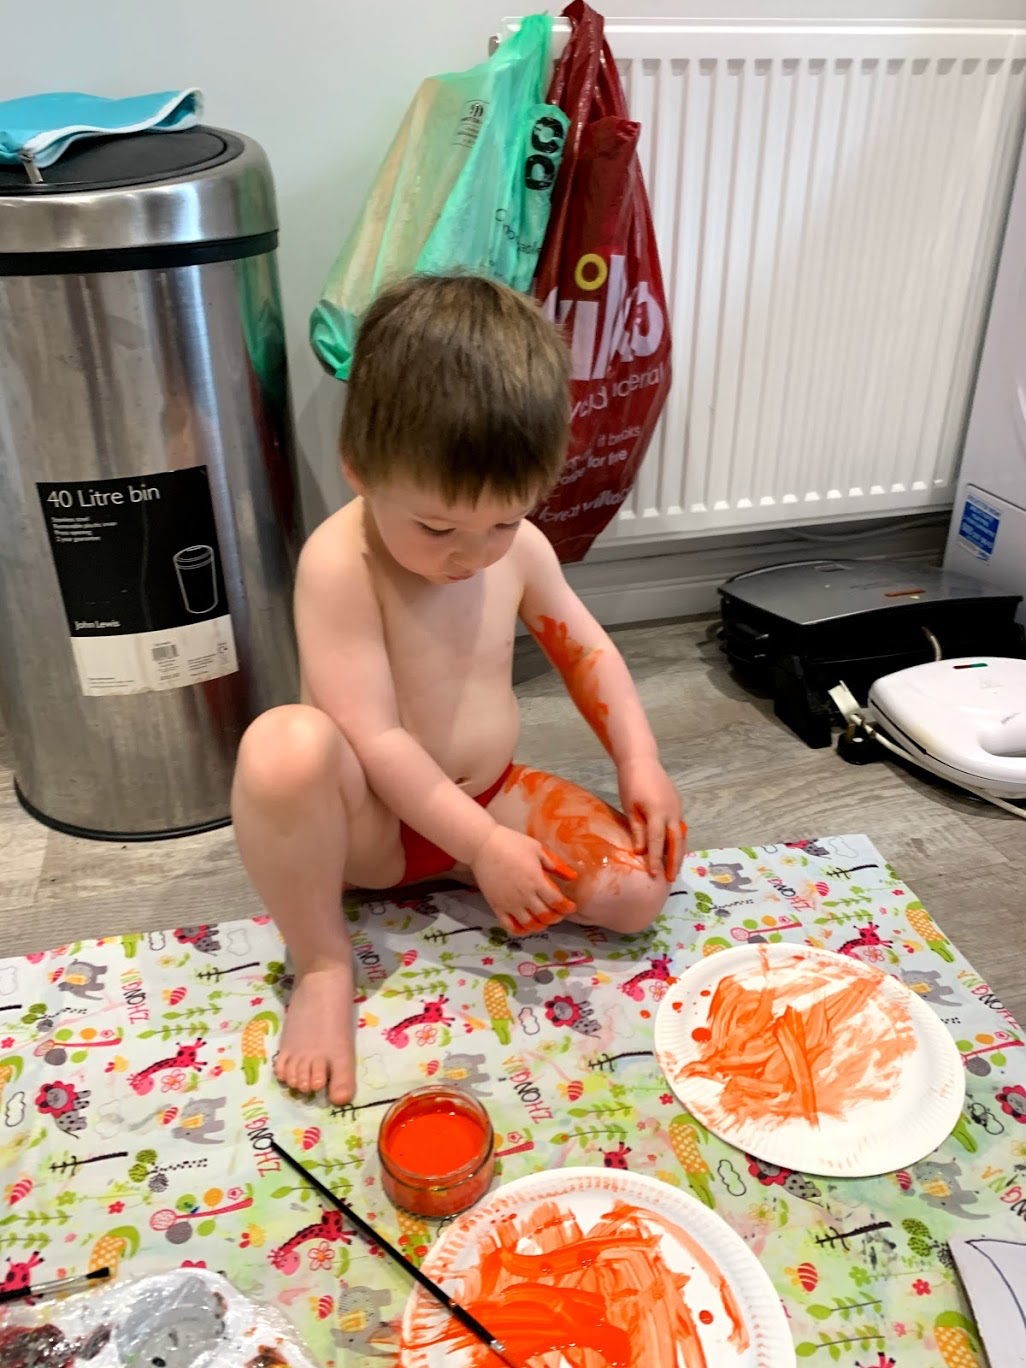
Pumpkin Finger-painting – resources: plain paper, pen, orange and green paint.

This was another super simple idea. I drew a pumpkin shape onto a plain piece of paper then gave Robbie some orange and green paints and let him go. I helped him to cover the whole paper when he had finished his contribution. We then drew on a face with a black pen and cut them out to use as Halloween decorations.
Egg Box Scary Eyes – resources: egg box cut into 3, white and red paint, googly eyes.

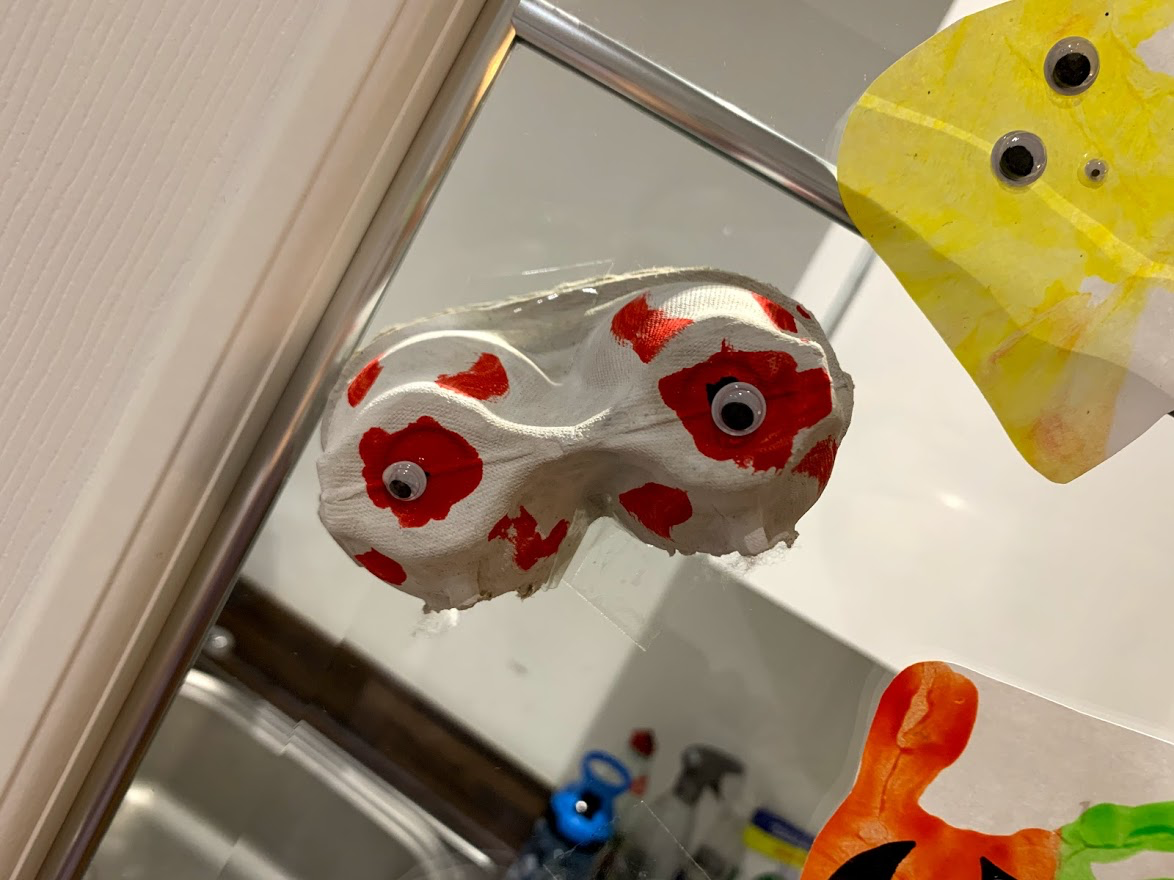
After cutting an egg box into 3 pieces we painted them all white and left them to dry. We then painted red dots onto the tops and red lines around the side and stuck on some googly eyes.
Paper Plate Pumpkins – resources: paper plates, orange and black paint, plain paper.
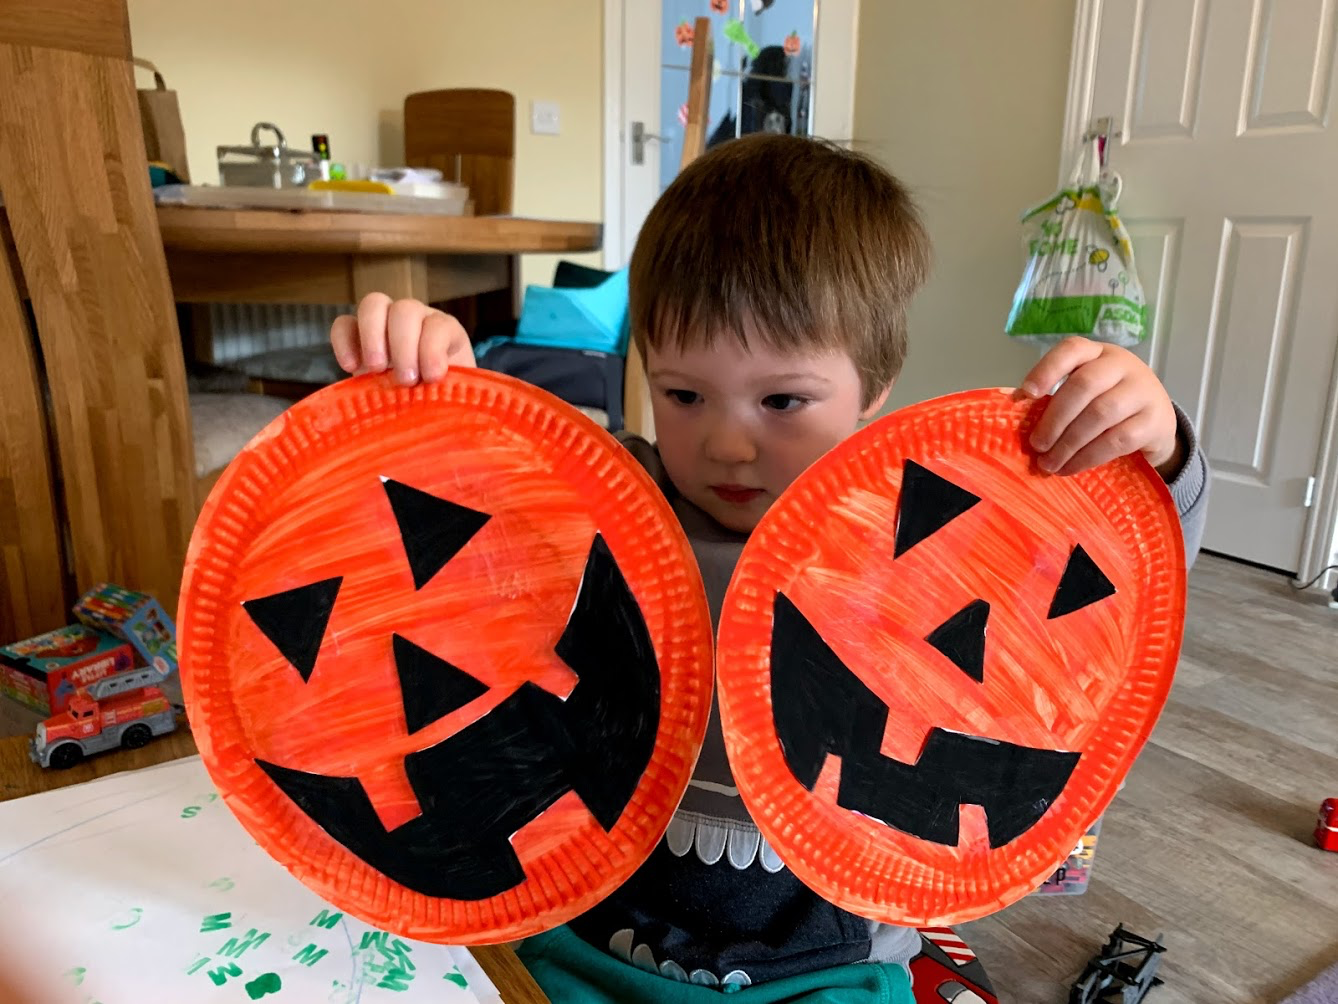
This is a simple and effective craft. we painted paper plates orange and left them to dry while we painted shapes for eyes, noses and mouths in black on a plain piece of paper. Once everything was dry we cut out the shapes and glued them onto the plates.
Handprint Bats – resources: plain paper, black, white and red paint, scissors, glue.
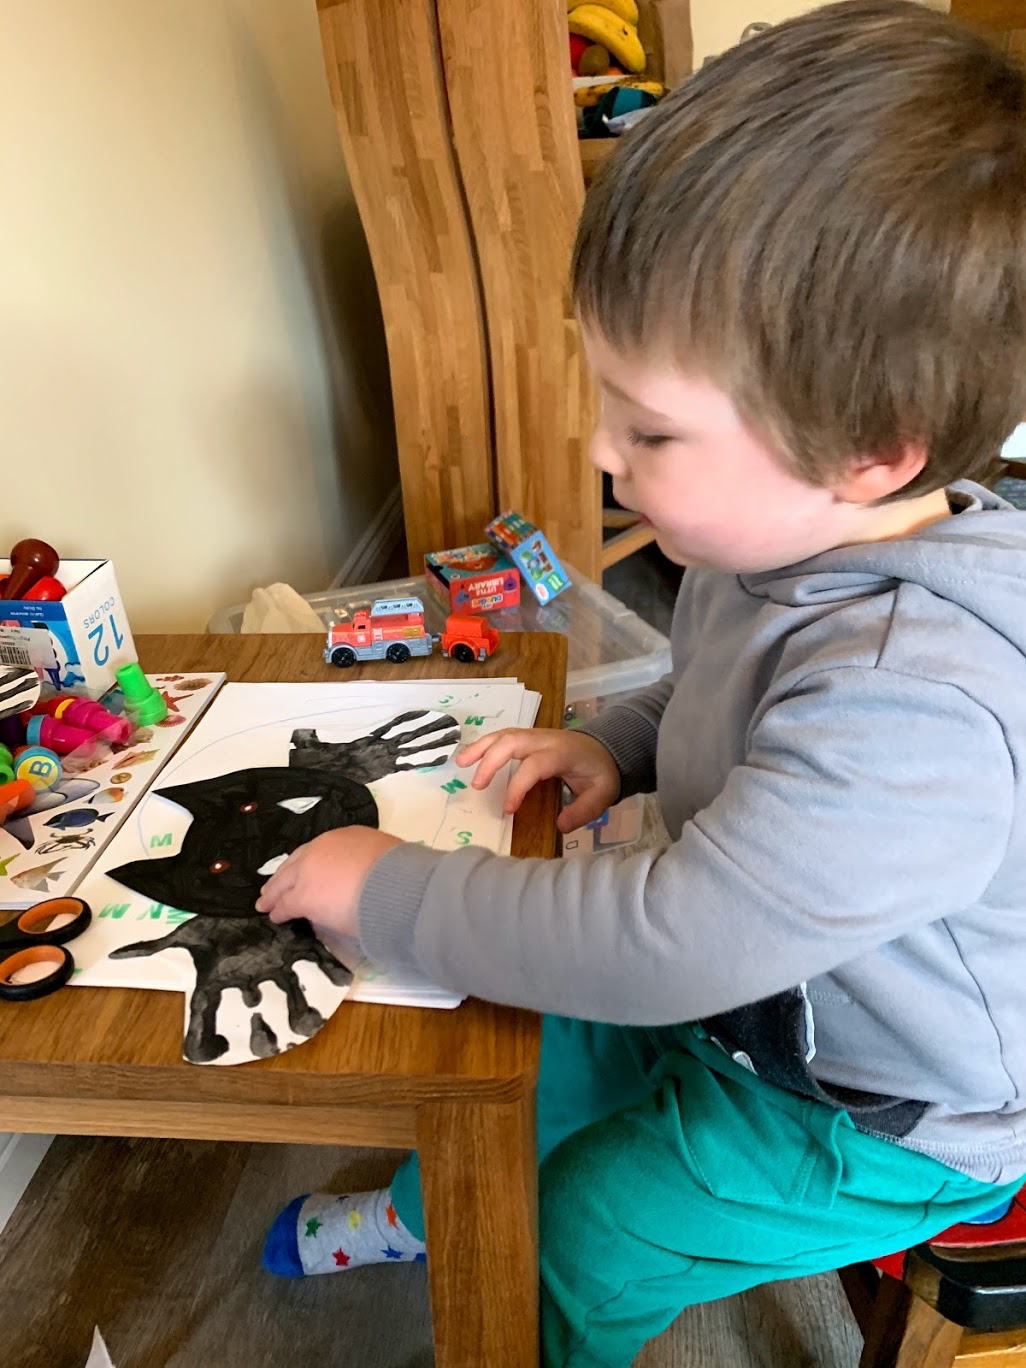
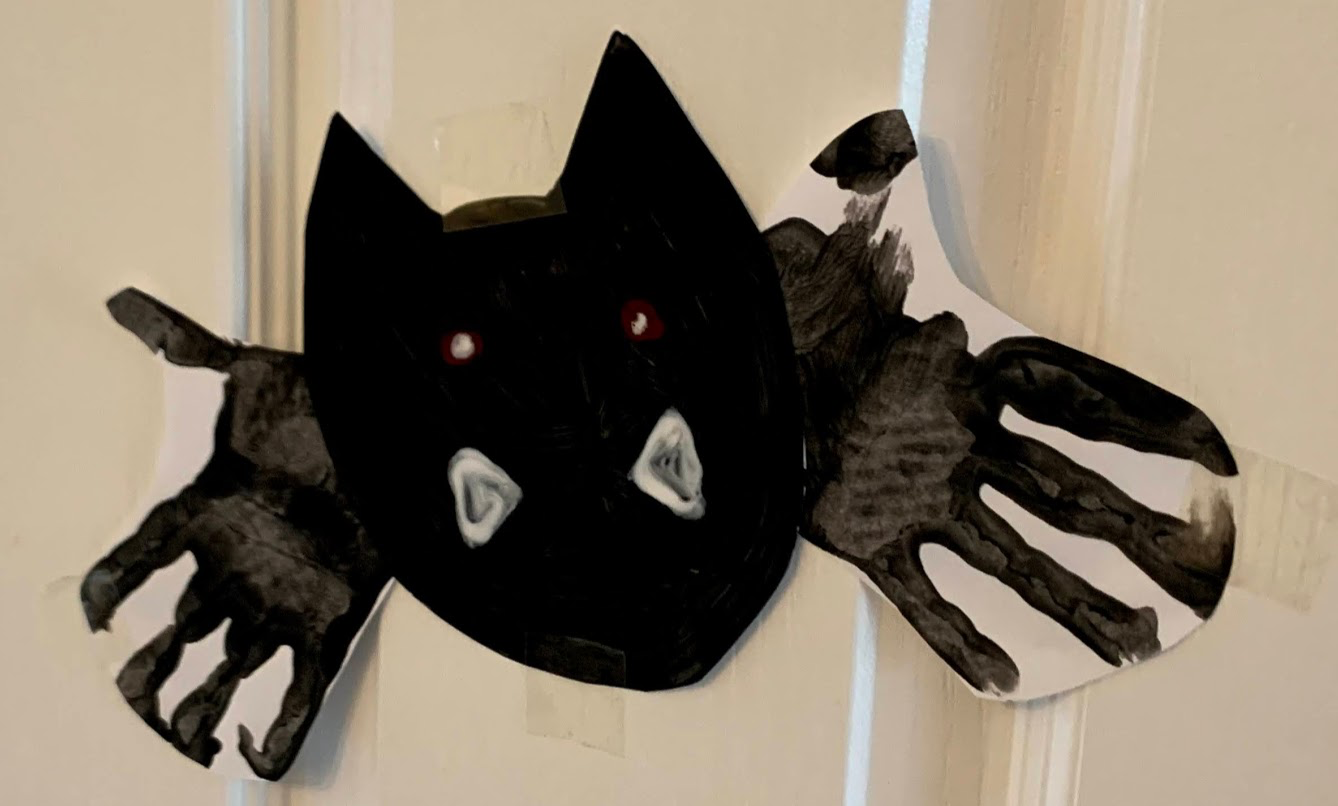
These are really cute little bats! We painted Robbie’s hands black and stamped them onto some plain paper. We painted a bat body shape black too and left them all to dry. We cut them out and stuck the handprints onto the body, painted on some white fangs and red eyes.
Pumpkin Carving – resources: pumpkins, sharp (serrated) knife, spoons, bucket, pen, candles.
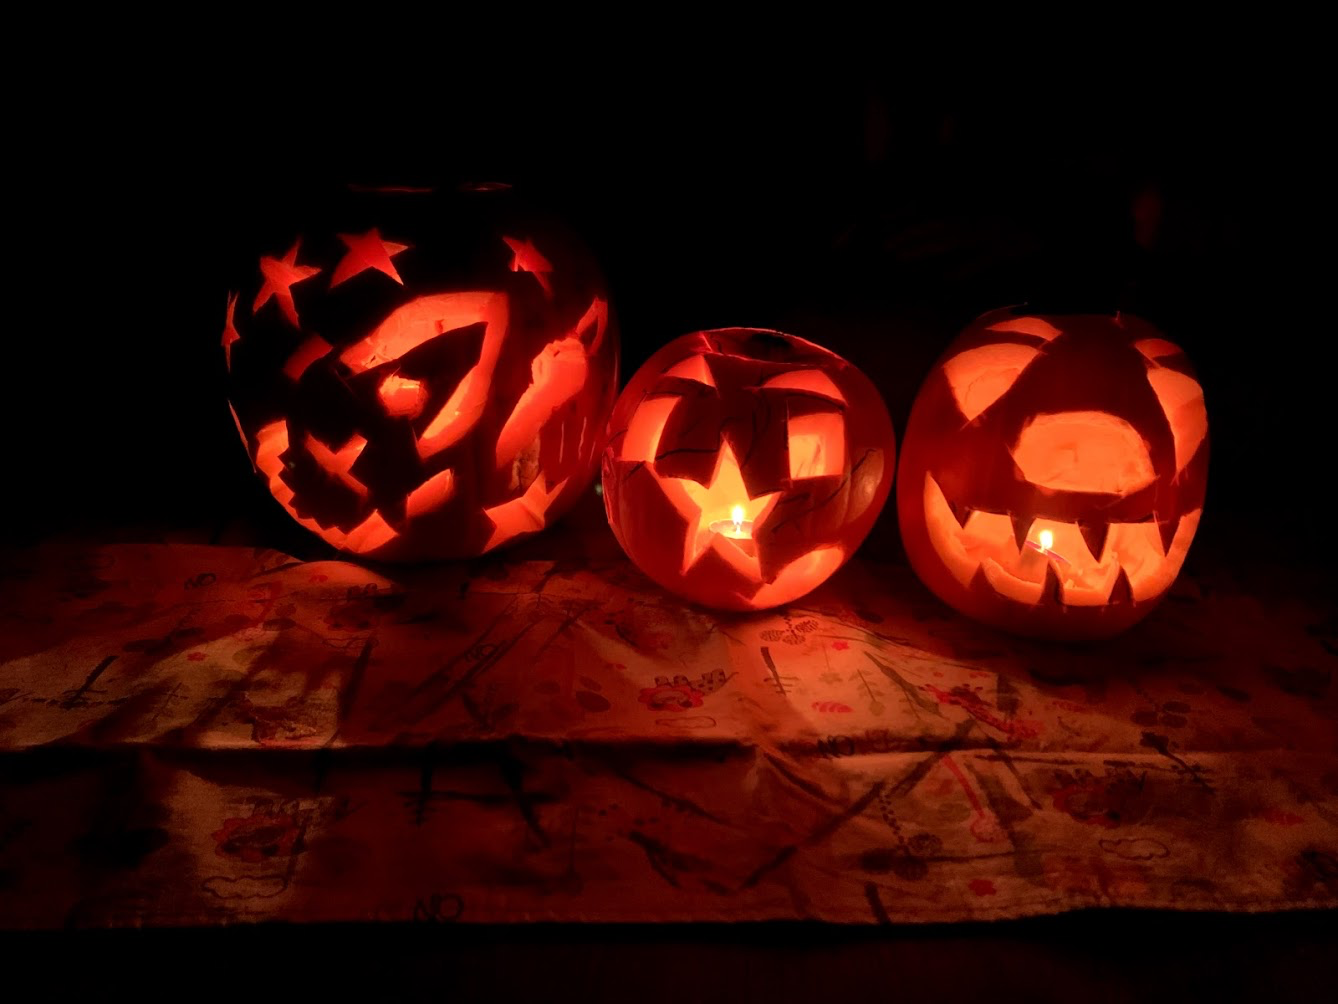

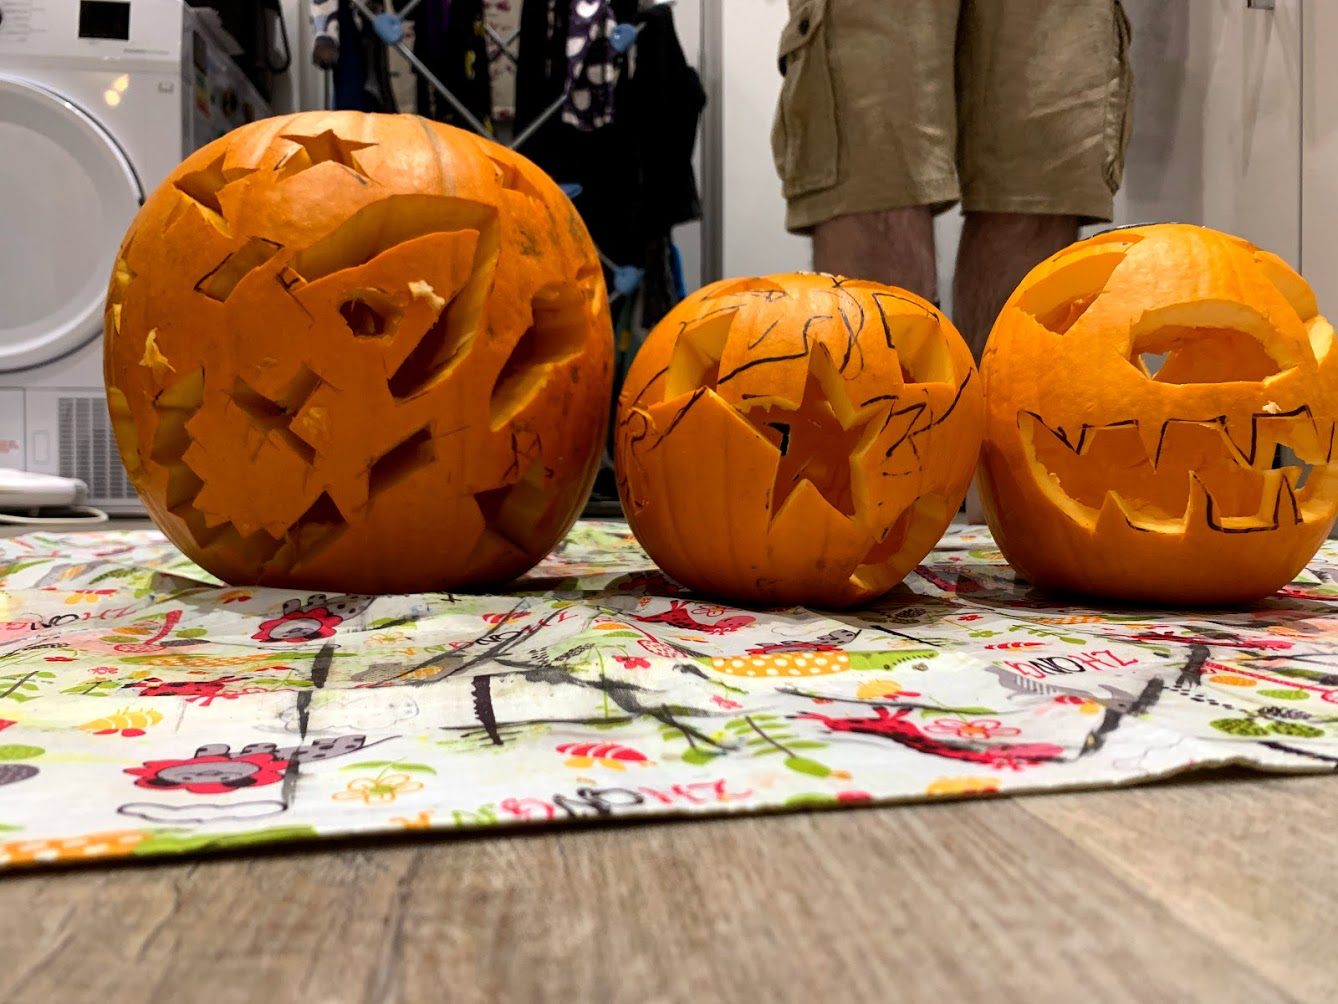

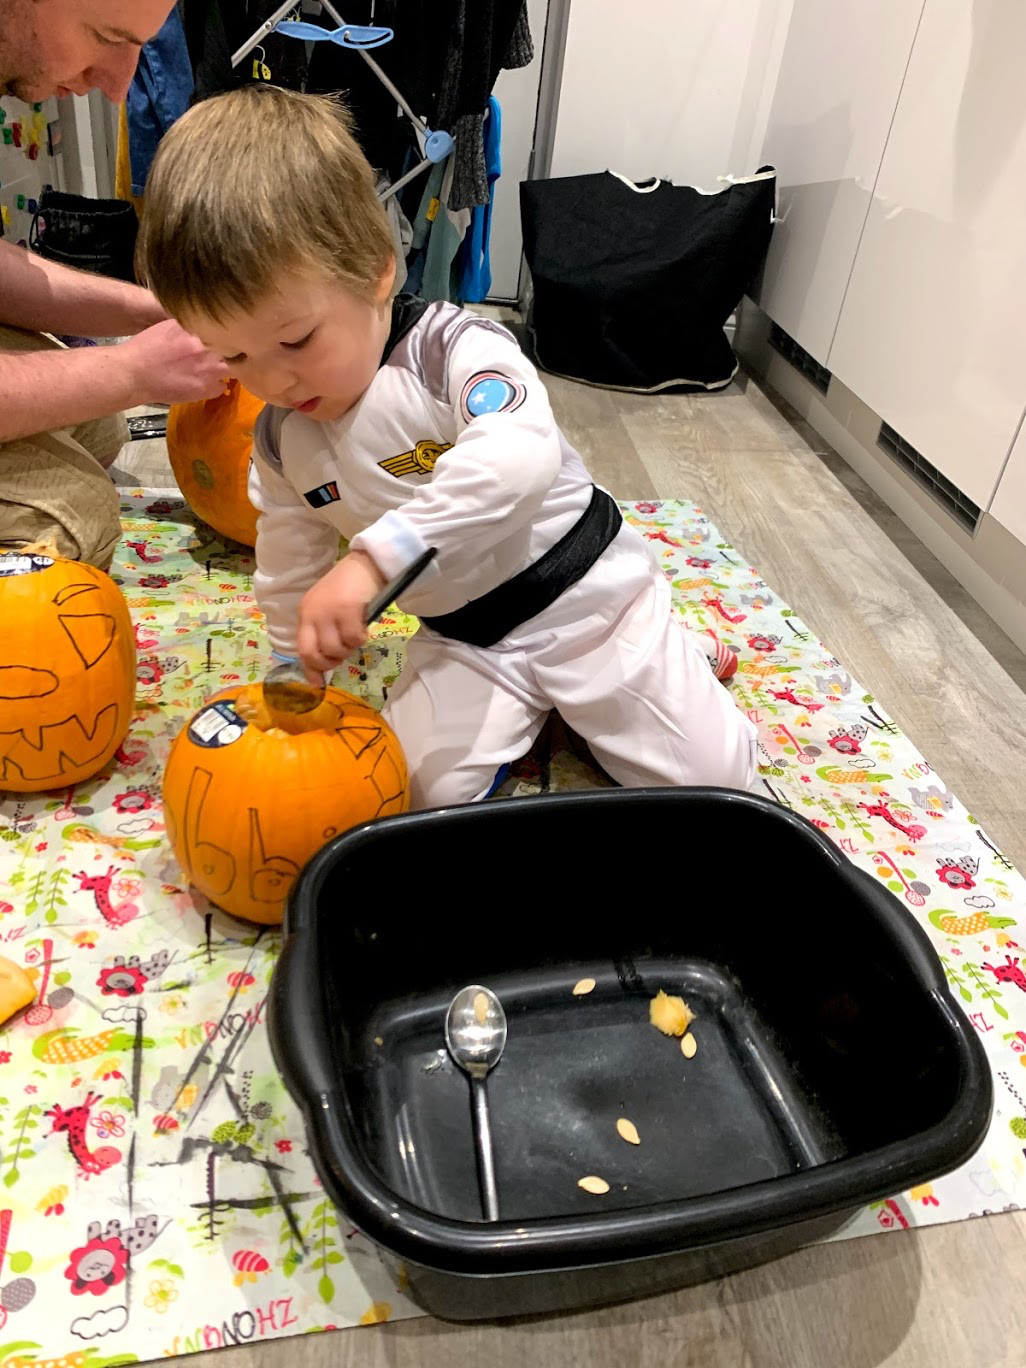
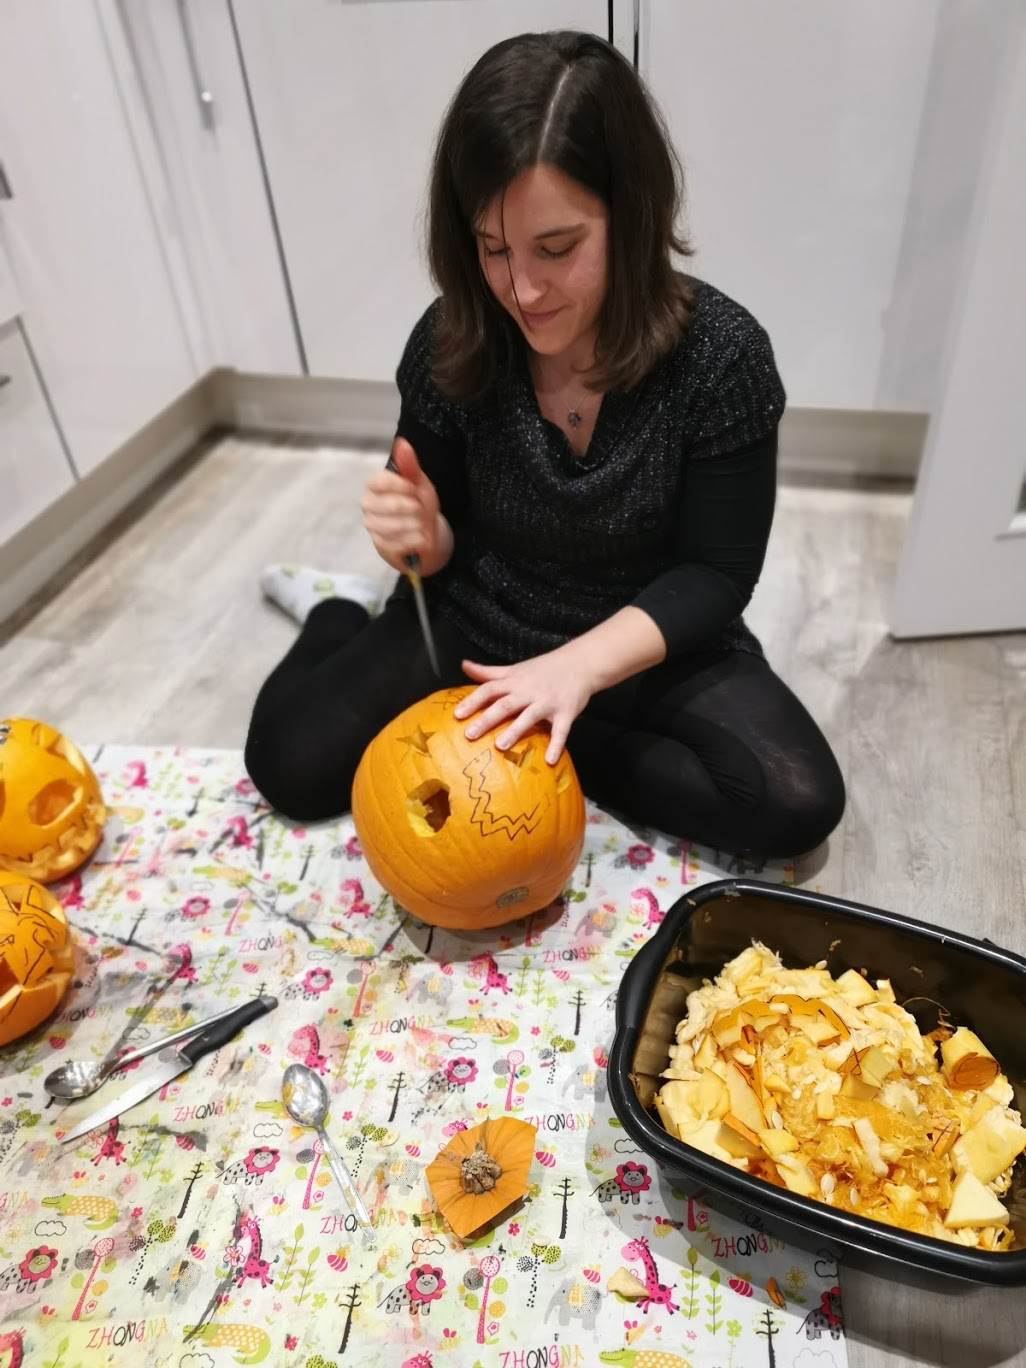
We had great fun carving our pumpkins this year! We decided to do 3 as we had ordered one in our food shop, however, it was damaged and would have been a little disappointing on its own. Robbie helped to decide on the design for the two small pumpkins with Mummy while Daddy designed the big pumpkin – all were drawn on in pen before we started carving. We chopped the top off them, making sure to angle the knife diagonally so that the top will sit nicely on the pumpkin and not fall in when replaced. Then we scooped out all the seeds and flesh of the pumpkin, talking about what it felt like and all the different components that we saw. Once the pumpkins were all hollowed out Mummy and Daddy cut out the designs. We put candles in them and turned out the lights to see their full effect.
I had planned to use the flesh to cook with, but we forgot. Next year I will definitely try to bake a pie or cook with the pumpkin flesh.
Using a knife to cut out the designs was hard work! You can buy pumpkin carving kits which have smaller tools that might make this easier. This is definitely something we will look into next year. It may also make it safer for Robbie to have a goo at the carving too.
Games and Sensory Activities
Sensory Jelly and Bugs – resources: large bowl, make your own jelly cubes or sachets, Halloween sweets, eyeball toys, toy bugs.
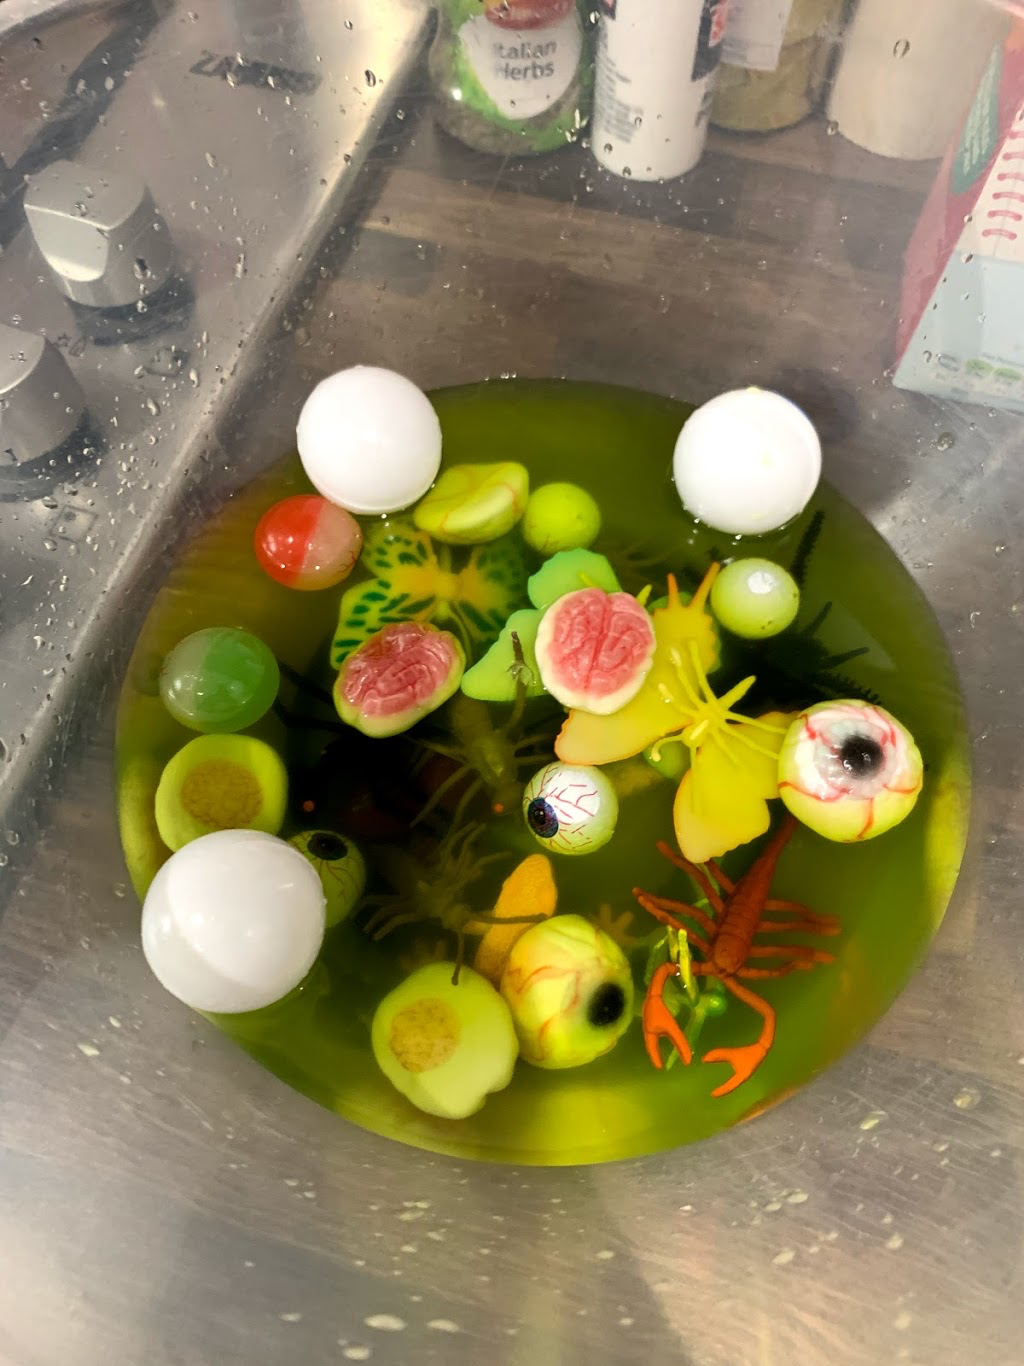
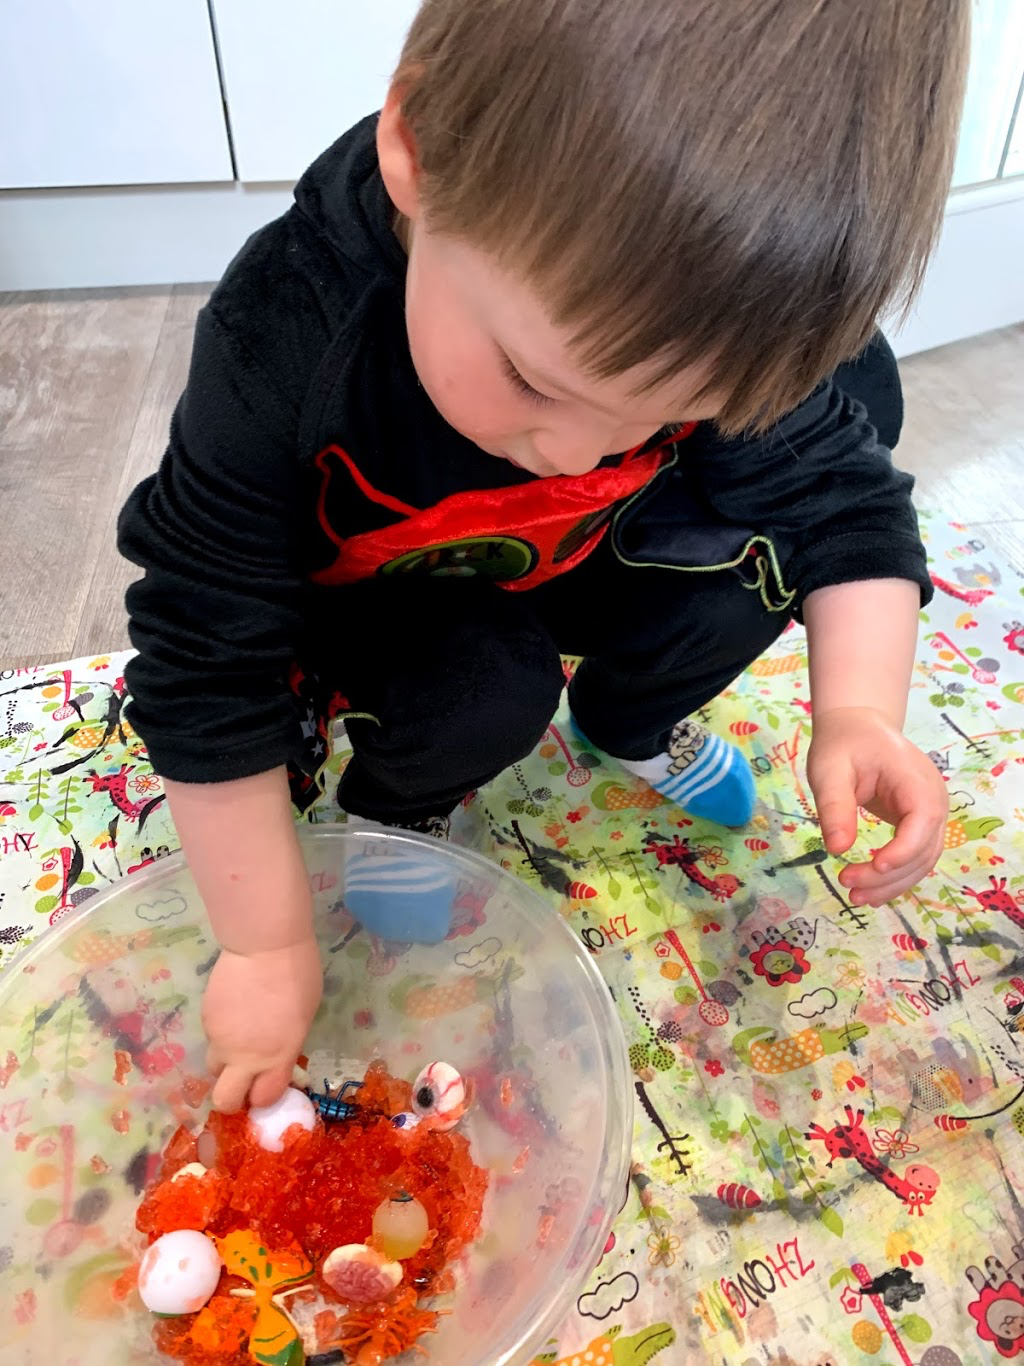
This was a firm favourite activity for our Halloween day. Robbie loves jelly and any activities with jelly involved have always gone down well. I made the jelly a few days before, following the instructions on the packet, and added in some sweet brains, sweet eyeballs and assorted plastic bugs, mice and eyeballs then left it all to set in the fridge. When we were ready to use it I brought out different utensils and our messy mat and let Robbie free to explore (and eat within reason) as much as he wanted.
Sensory Spaghetti/Noodle Worms – resources: large bowl, spaghetti, noodles, vegetable oil, Halloween sweets, plastic Halloween toys.
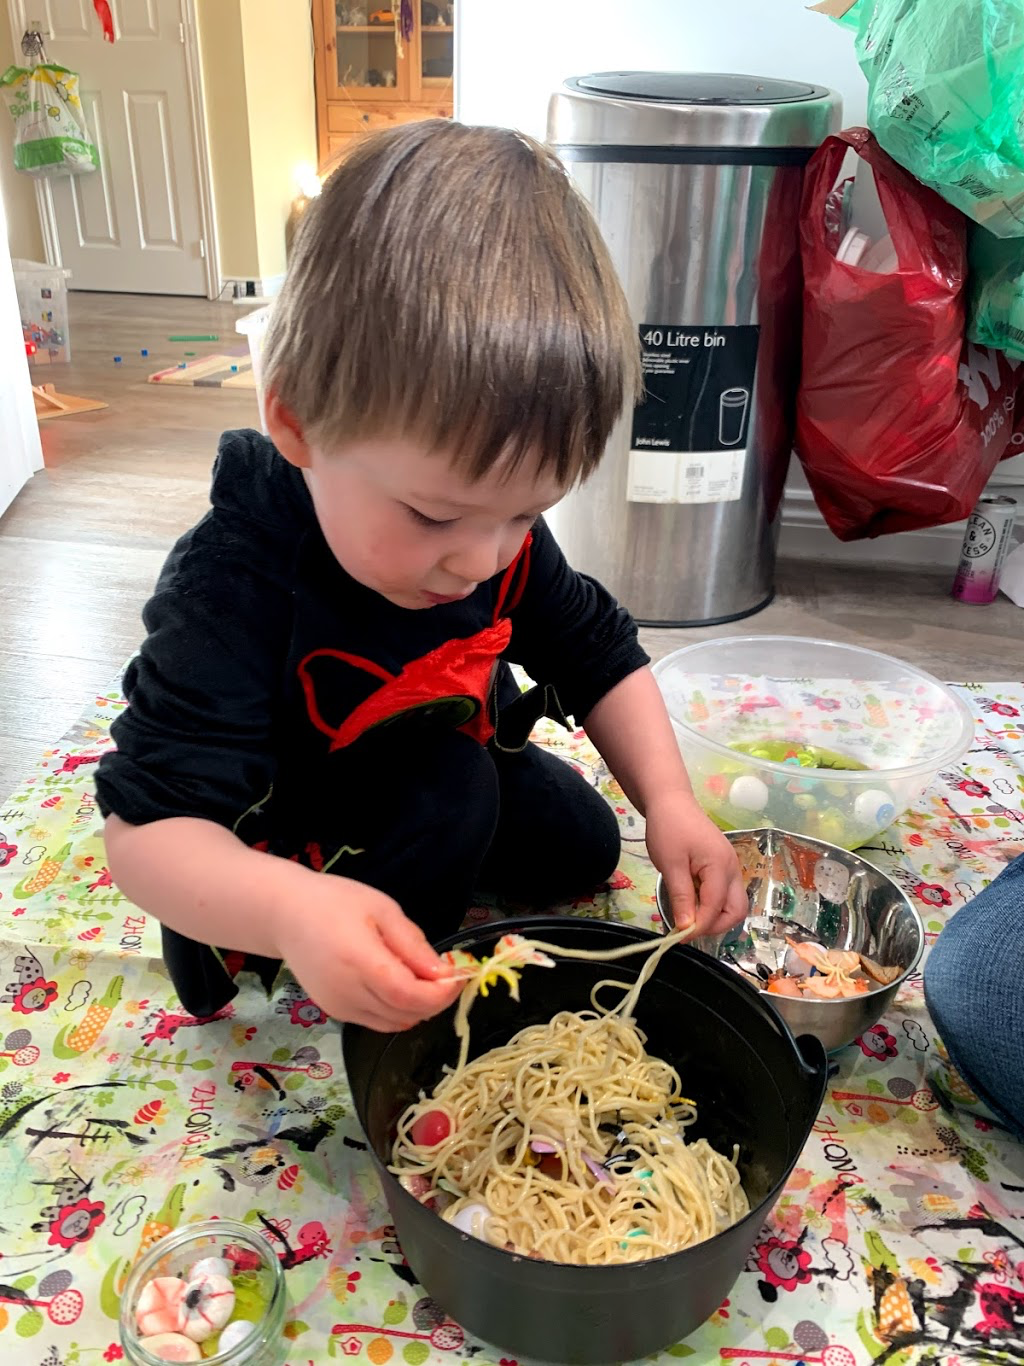
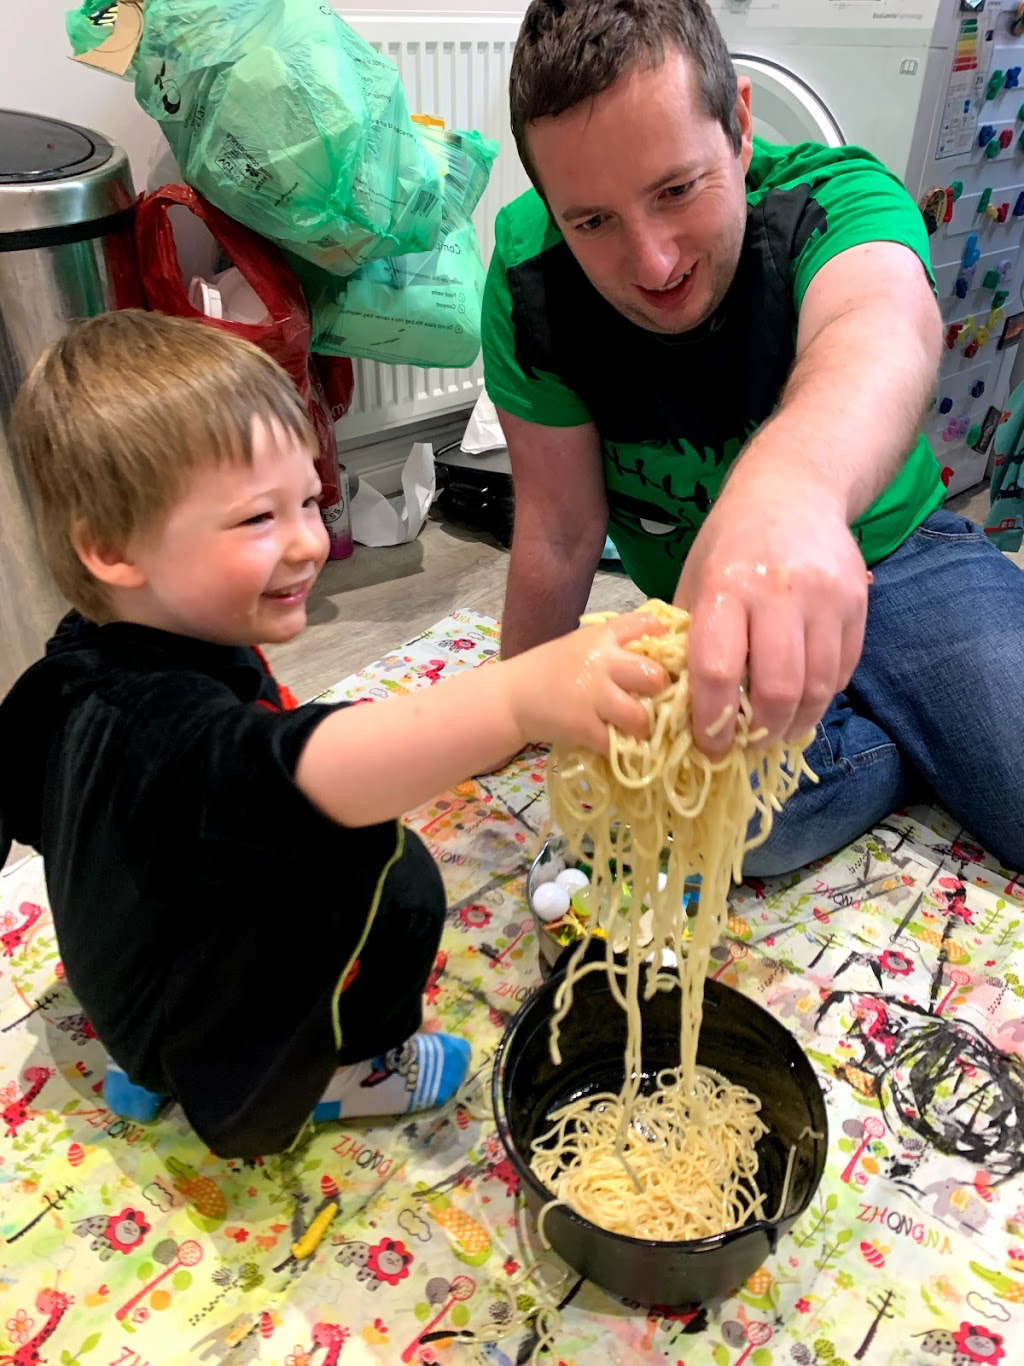
This was another great success for us on Halloween. I wasn’t sure how well it would go down, as Robbie can sometimes be a bit cautious with different textures on his hands, but love this. I cooked some spaghetti and some noodles (because we didn’t have enough spaghetti) earlier in the morning, drained it and added some vegetable oil to stop the spaghetti and noodles sticking together. Once it was cooled I added in sweaty brains and eyeballs and plastic toy bugs, mini and eyeballs. I set this out alongside the jelly sensory activity. Robbie had great fun finding all the objects and playing with the “worms”.
Skittle Pumpkin Experiment – resources: orange and green skittles, warm water, white plate.
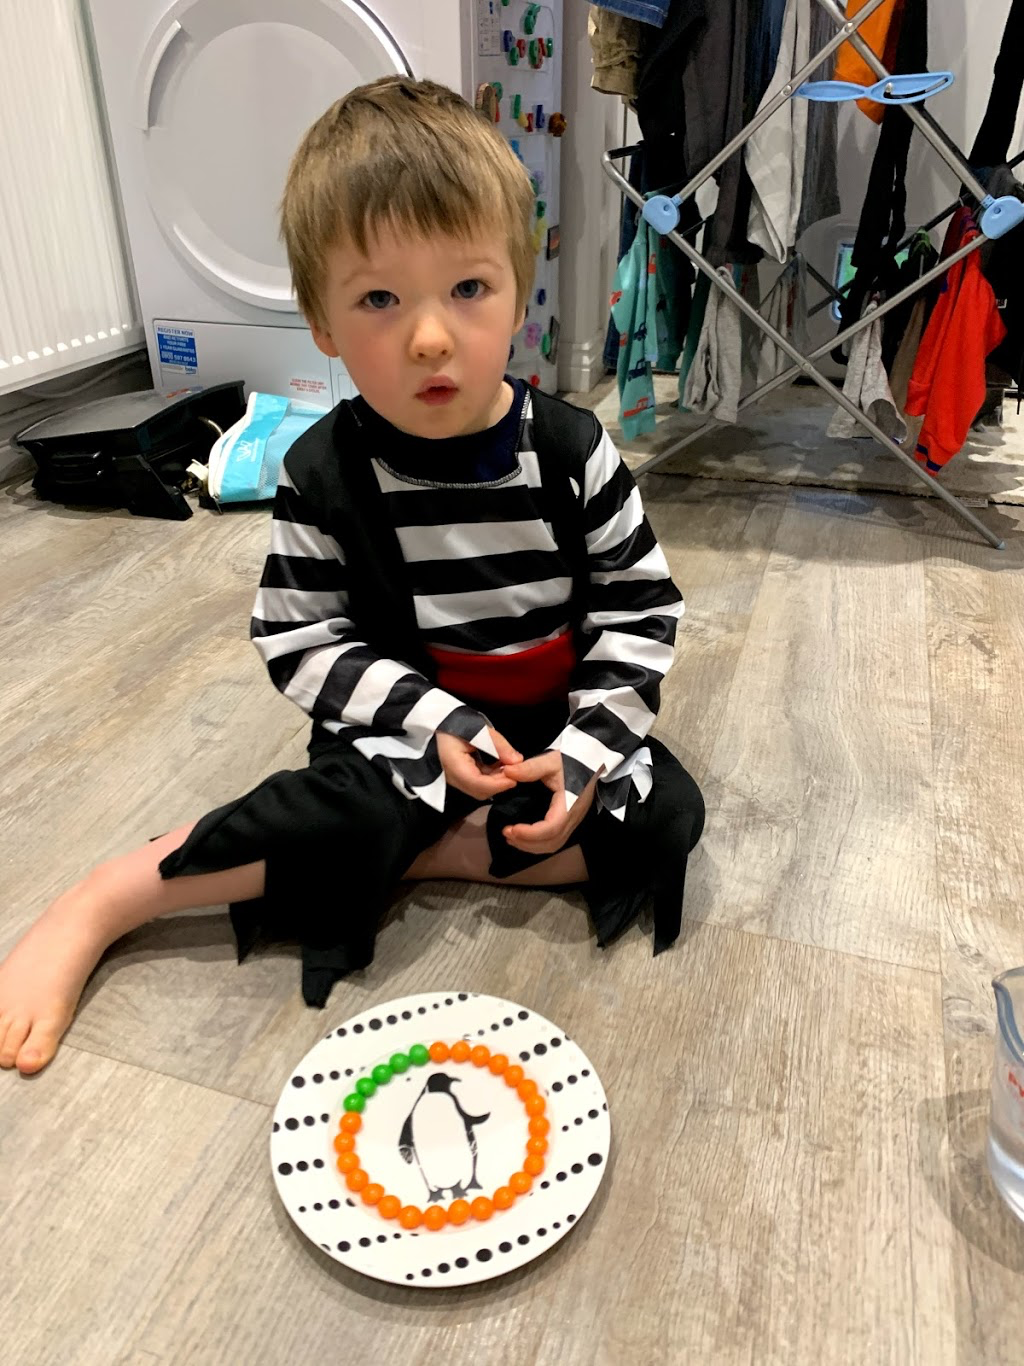
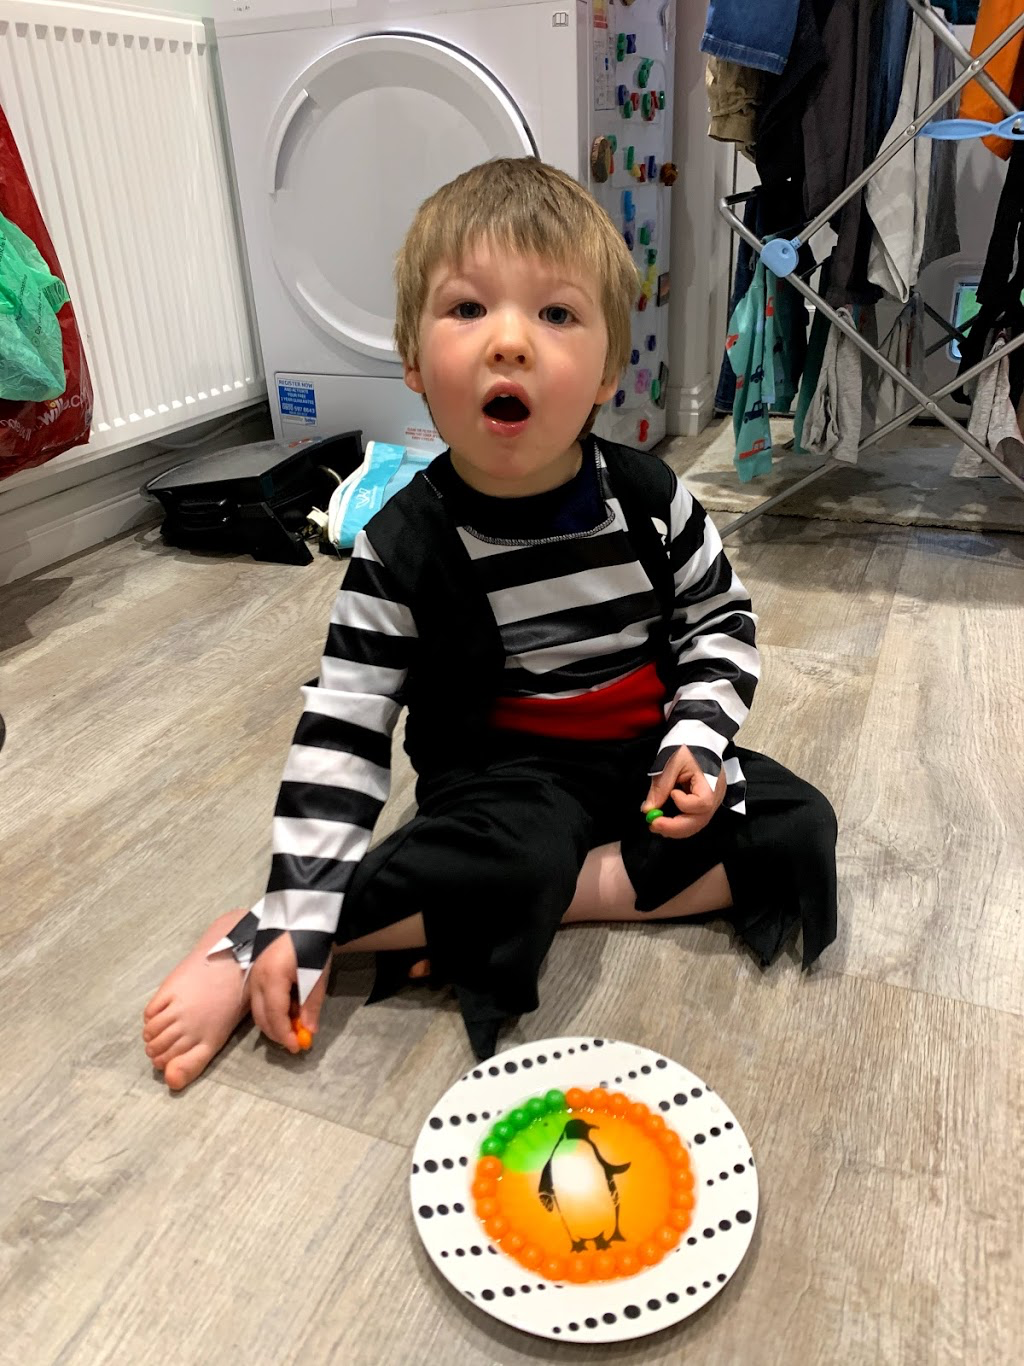
We did this experiment during our weather focus week which Robbie had really enjoyed, so it was great to do it again with a Halloween theme. It is super easy to do to which is always a bonus. I put orange and green skittles around a white plate and added a little warm water into the middle of the plate. We then watched at the colour of the skittles started to seep into the middle of the plate.
Witches Hat Ring Toss – resources: cardboard (from amazon boxes), takeaway coffee cups, black/green/orange paint, sellotape.

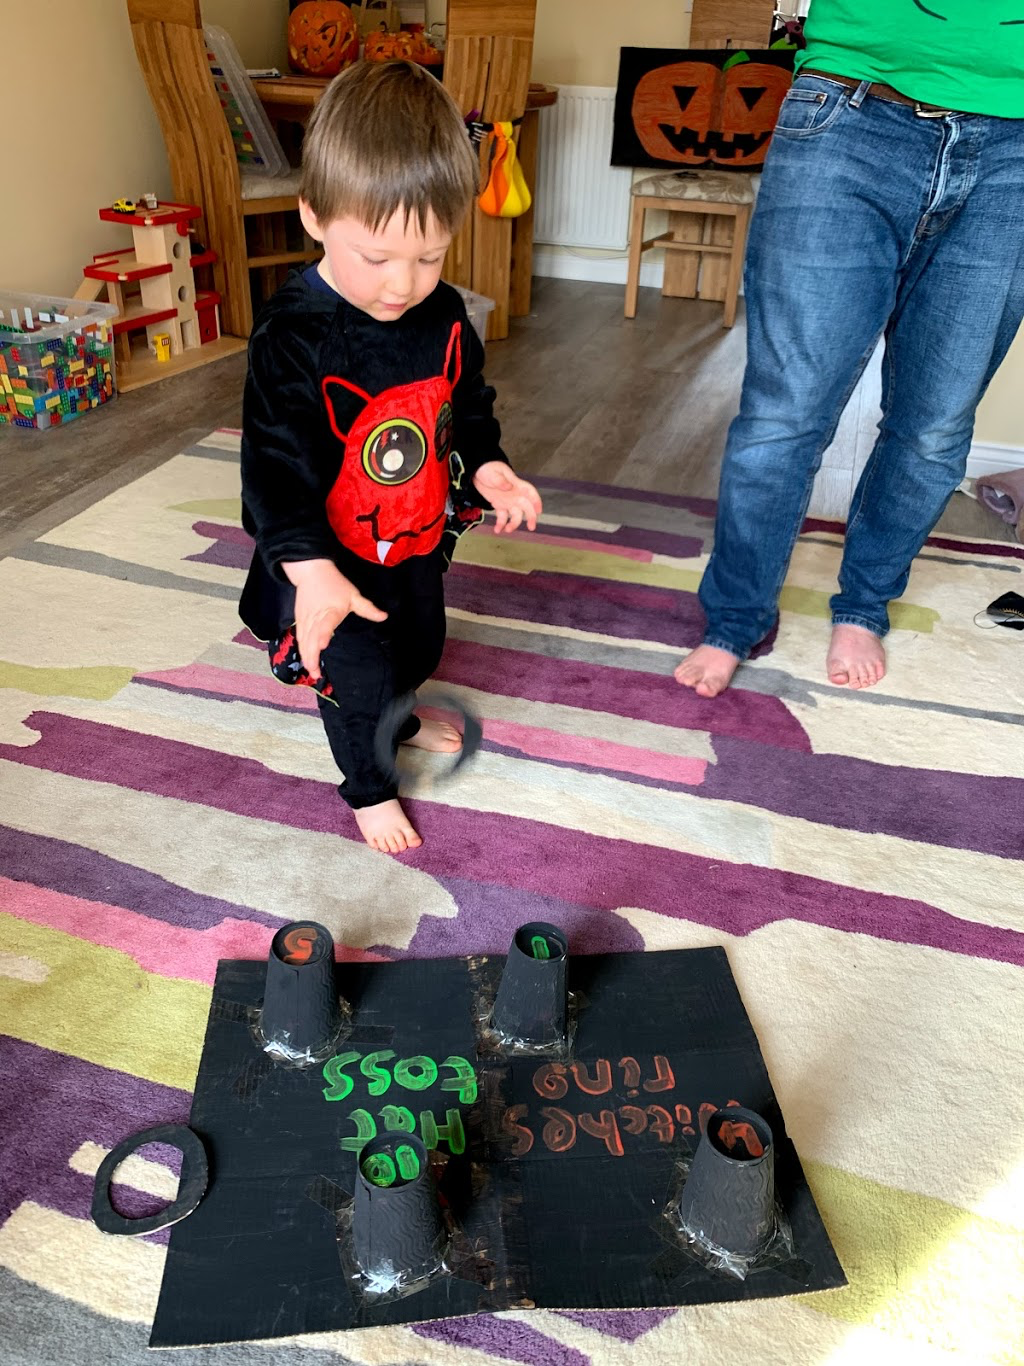
I really like this wee game. It was really easy to make and fun to play. I broke apart an amazon box, stuck two large pieces together with sellotape and pained it all black. I also painted 4 takeaway coffee cups black and cut out 6 rings of cardboard and painted them black as well. Once they were all dry I sellotaped the cups to the base and pained numbers onto the bottom of each to keep score.
We tried to play the game by throwing the rings over the cups, but the cups weren’t pointed enough and the rings were quite small which made this very difficult. We decided to change tactic and played it more like “Dookin for apples” where we stood above the board and tried to drop the rings not the cups. This was much more effective and we all had great fun.
Pin the Nose on the Pumpkin – resources: cardboard (an old amazon box is perfect), black, orange and green paint, sellotape.
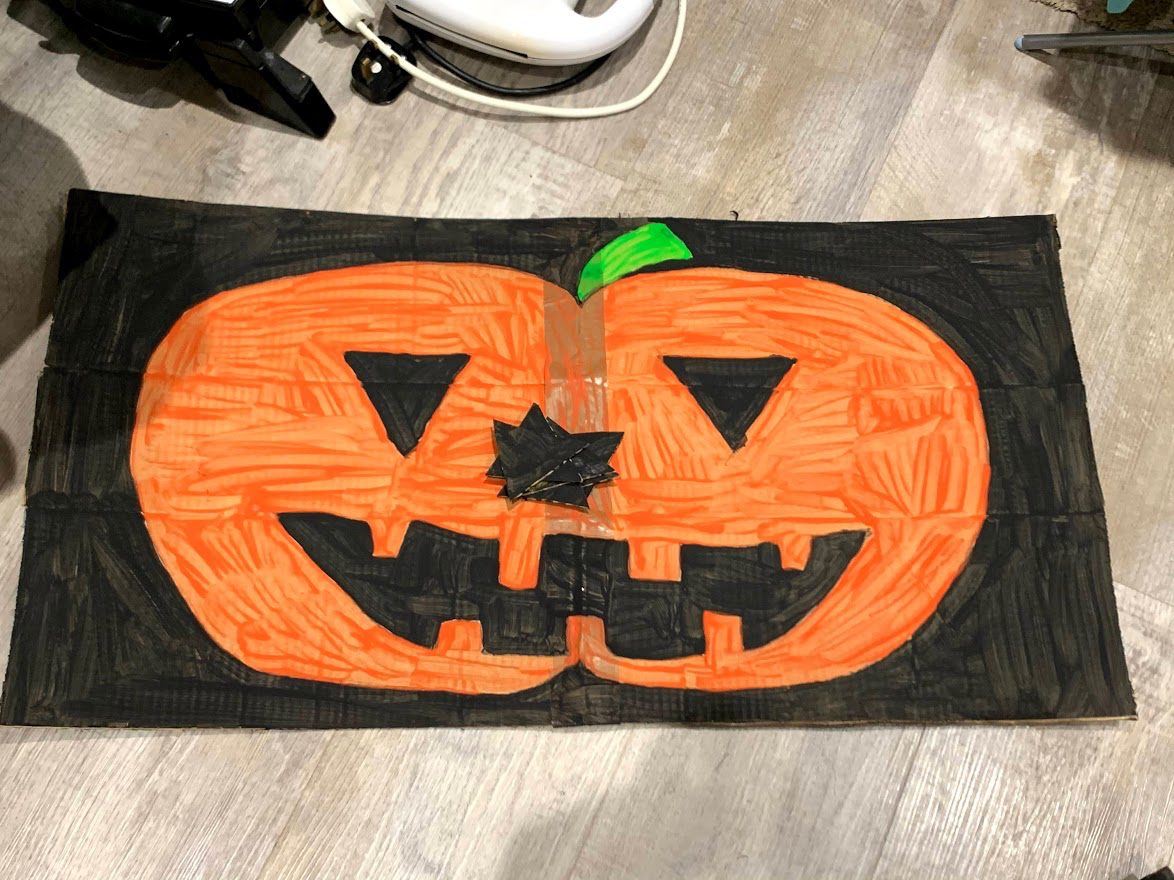
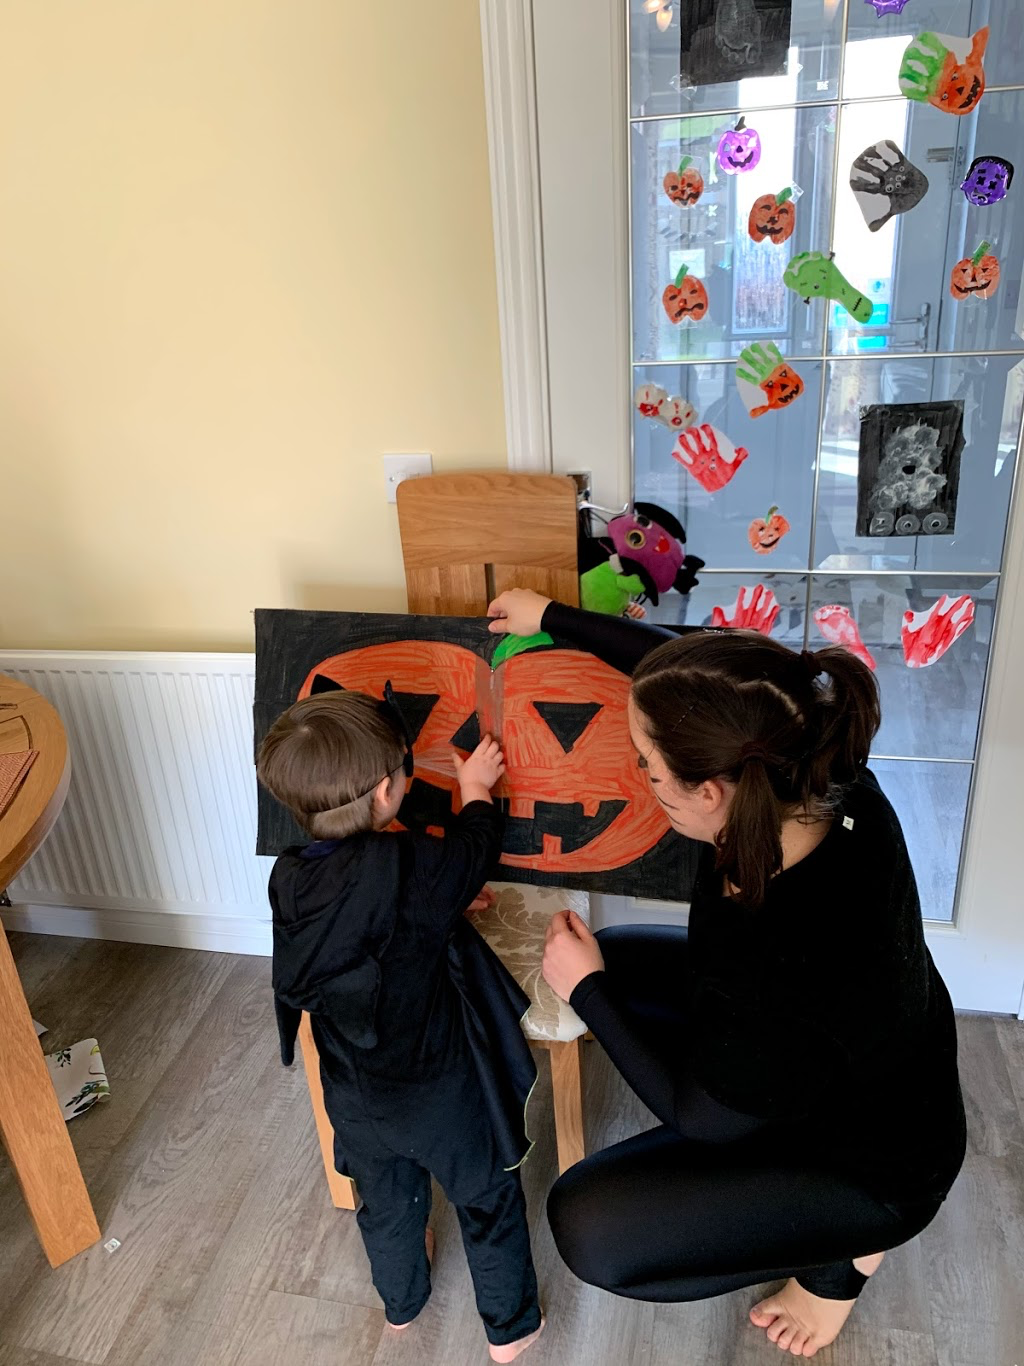
This is a classic and can be tweaked to fit any theme. To make the game I dismantled an old amazon box and sellotaped two large pieces together. I drew a pumpkin shape in the middle with eyes, a mouth and a stalk. I painted the pumpkin orange, the stalk green and the face and background black. I also cut out 6 triangles and painted these black too.
To play the game we put a blindfold on the player, spun them around a few times and game them a triangle “nose” with sellotape on one side. The player then tried to make their way to the pumpkin and stick their nose as close to the middle as they could.
We had great fun playing this game and Robbie was really good at it.
Doughnuts on a String. resources: mini ring doughnuts, string.
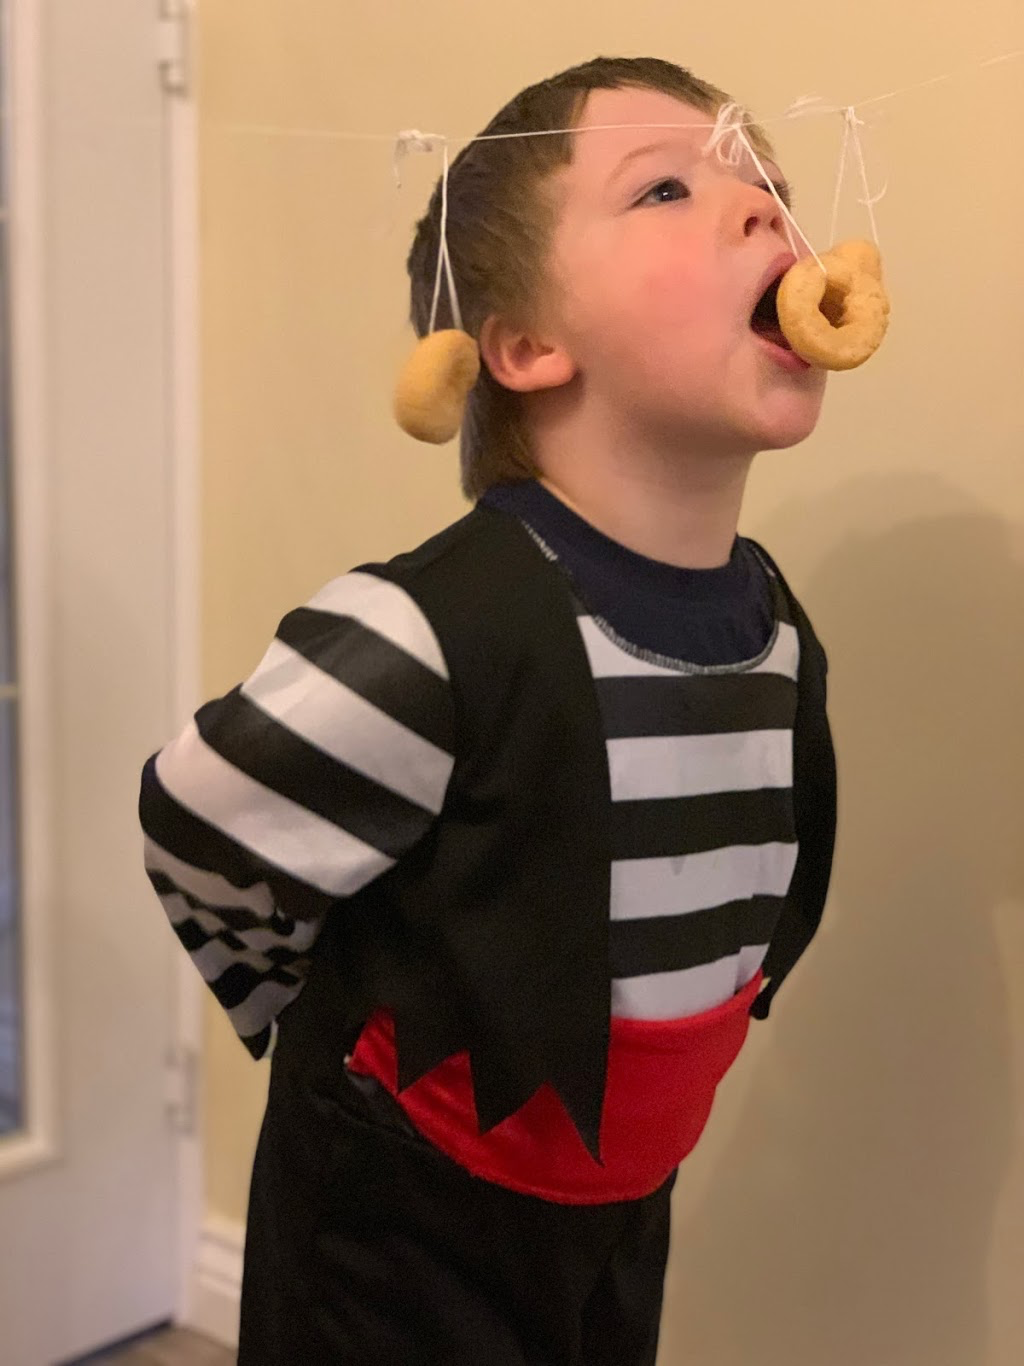
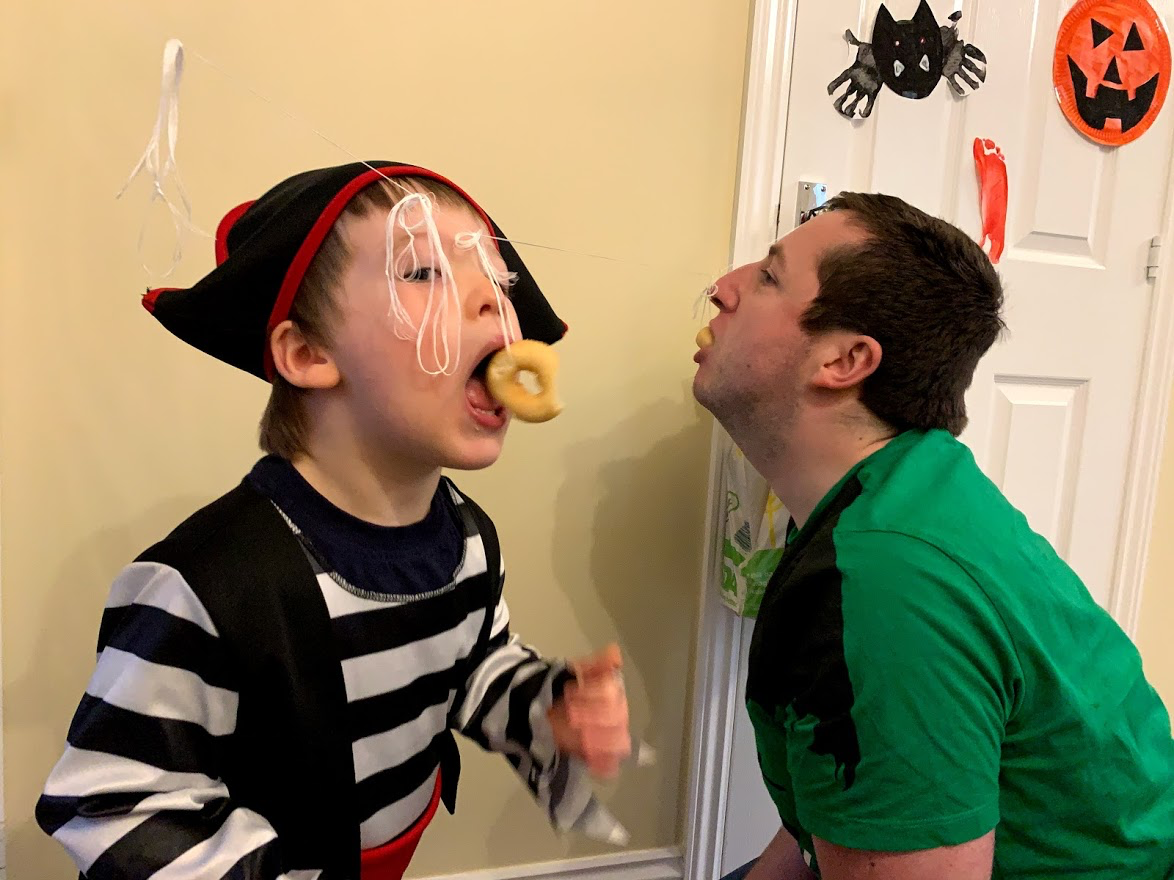
This is a classic and reminds me of great Halloween parties when I was younger. I tied a length of string around our living-room door handle and the handle of the cupboard under the stairs. I then put a length of string through each mini doughnut and tied these onto the main string.
To play you have to try and eat the doughnut without using your hands to stop it swinging around. Robbie loved this game and was really good at not using his hands.
Dookin for Apples – resources: shallow basin or sink, water, apples, fork (optional).
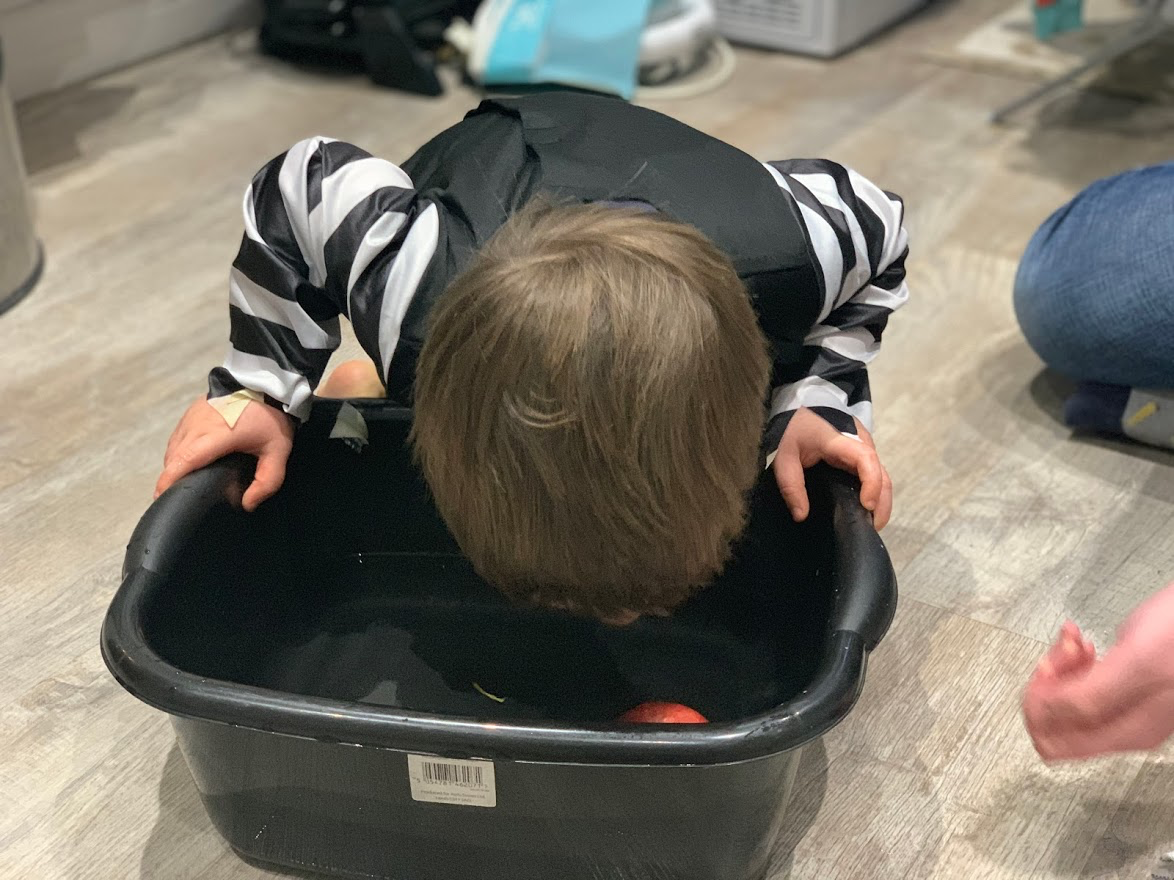

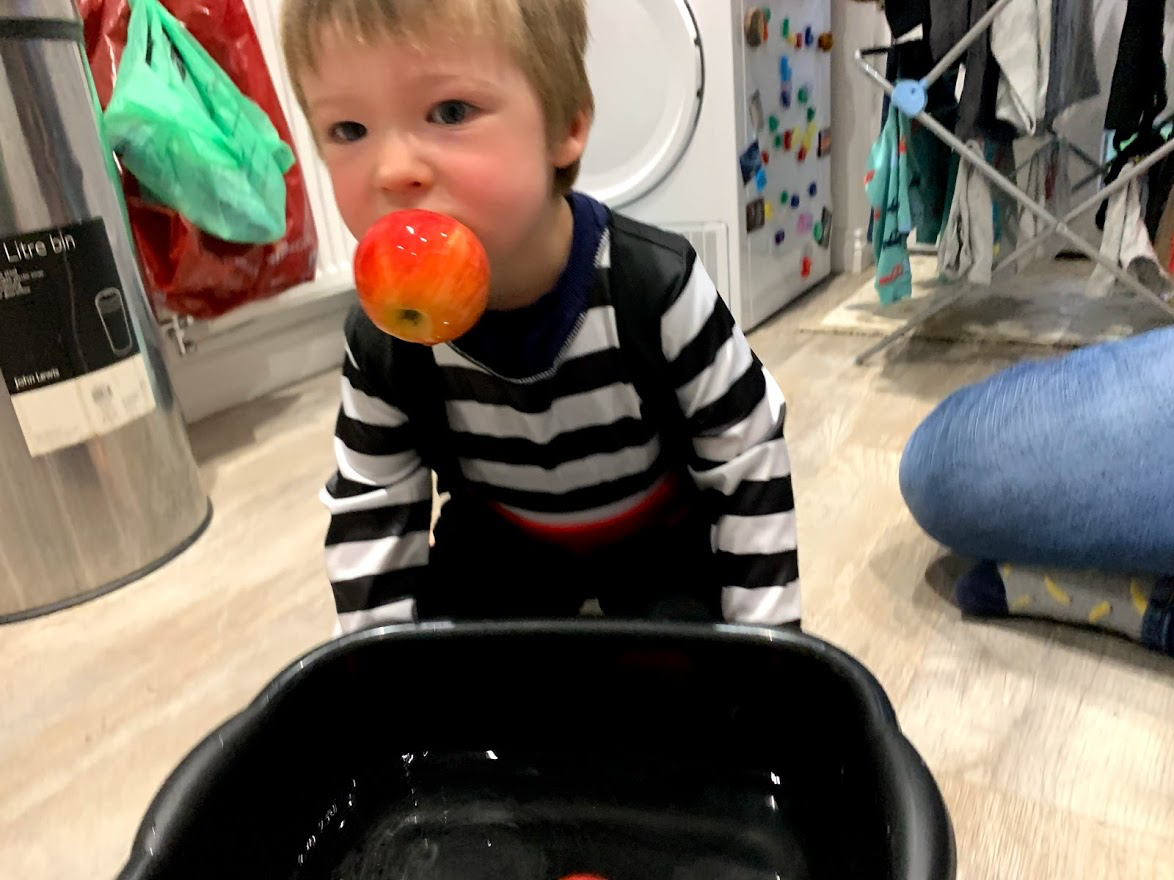
You can’t have Halloween without Dookin for Apples! We filled our sallow basin with warm water and popped in a few apples. I left the stalks on to make them easier for Robbie to grab as he isn’t a fan of putting his face in water. We then took it in turns trying to catch and apple without using our hands. Robbie was most definitely the best at this.
You can also use a fork for this game, where you stand above the basin and drop a fork into the water and try to spear an apple. We didn’t try this way this year though a Robbie enjoyed catching them with his teeth.
Food
Boonanas and Orange Pumpkins – ingredients: bananas, oranges, raisins, celery (chocolate biscuit crumbs as an optional extra)

I made this as a Halloween breakfast for Robbie and I and he thought it was great fun. I cut a banana in half and pressed raisins into each half to make the eyes and mouth. I peeled a satsuma, pressed two raisins in-between the segments and eyes and popped a small piece of celery into the middle as a stalk.
You could add to this by crushing up some chocolate biscuits to make soil, but as it was breakfast time I used some of Robbie’s cereal instead.
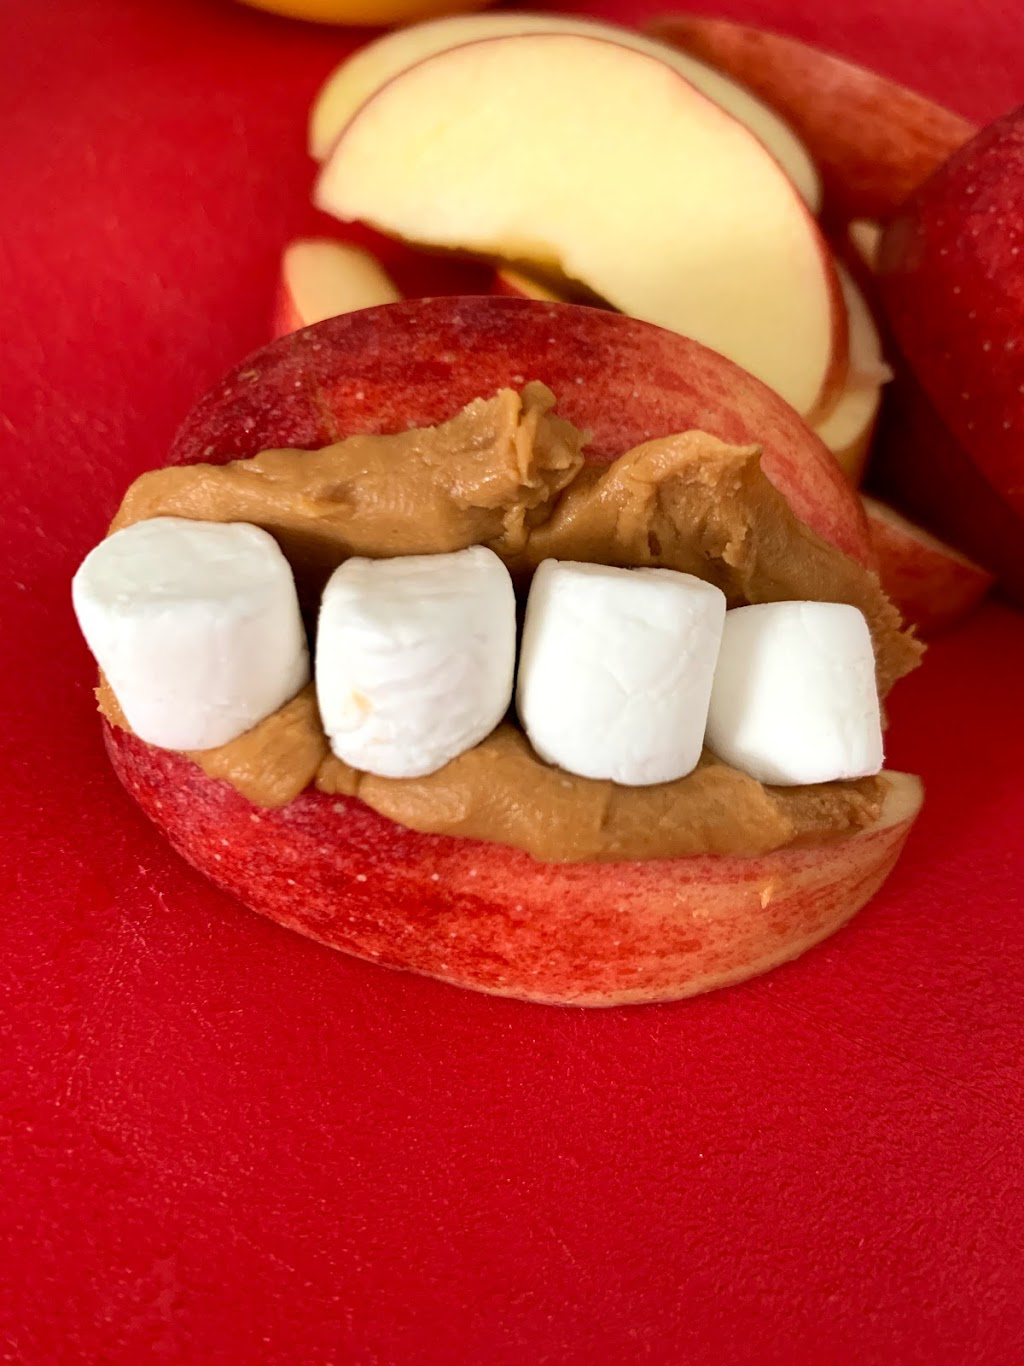
Apple, Peanut butter and Marshmallow Mouths – ingredients: apples, peanut (or alternative) butter, mini marshmallows.
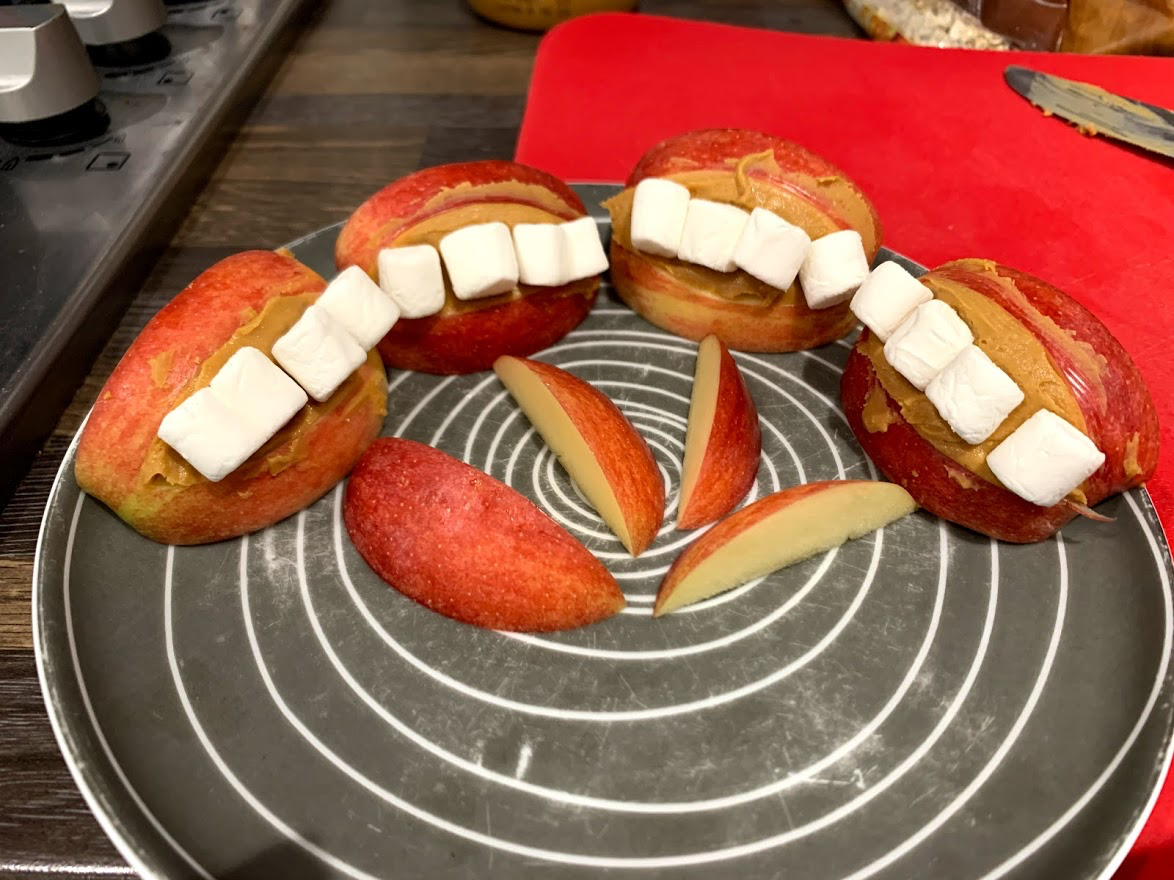
I loved this idea for a Halloween snack when I first saw it so added it into our day. I made it two different ways but wasn’t overly sure about the best way to make them.
The first time I cut an apple into 4, cored it and thence a smaller section out of the middle of each section. I filled this space with peanut butter and then stuck on some mini marshmallows as teeth. This made the marshmallows stick out and didn’t make the snack look like a mouth as much as I wanted, but still tasted nice.
The second time I cut an apple into 8, cored each piece and then put peanut butter along one side of each of the pieces of apple, placed mini marshmallows along 4 of them and then put the other segments on top. These were a little more like mouths but were harder to eat.
Tortilla Pizza Witches Fingers – ingredient: flour tortillas, tomato puree/ passata, cheese, red/yellow or green peppers.
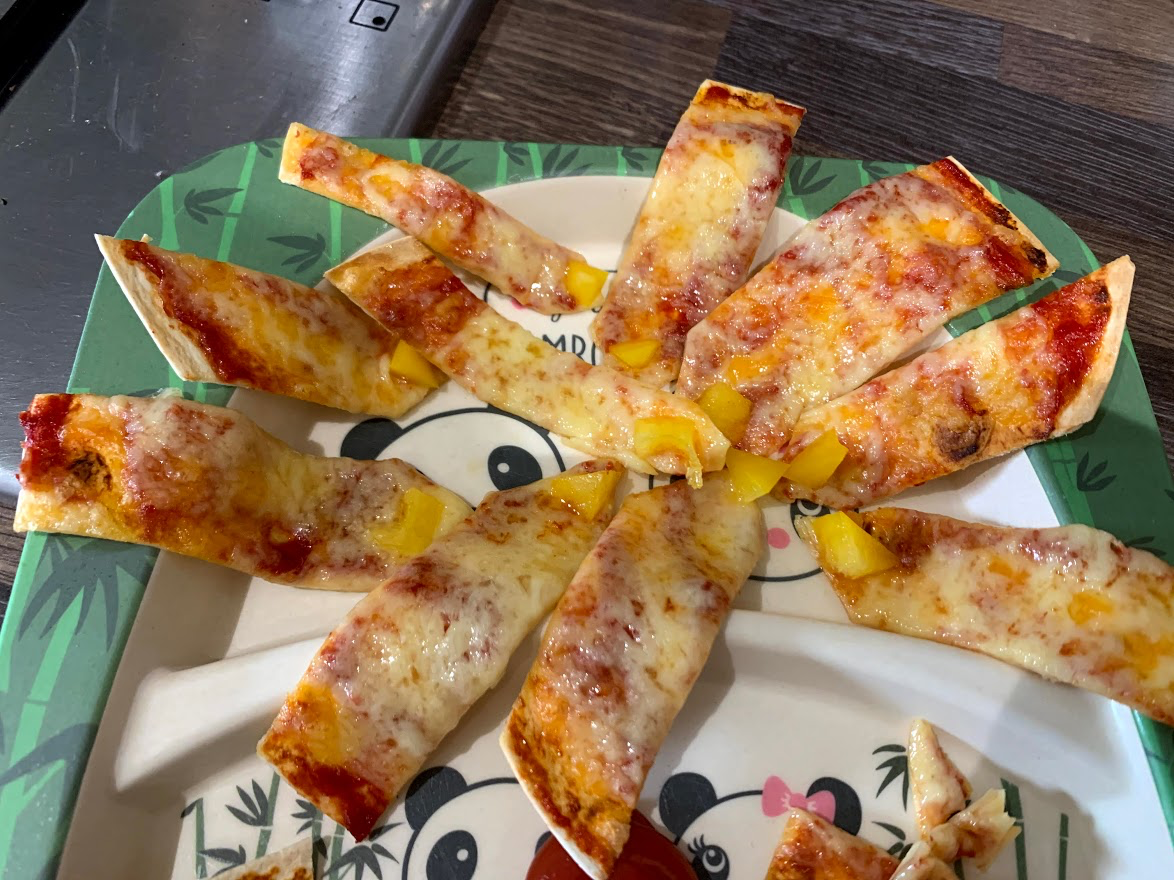
These were good fun, but definitely rough and could be improved. The original idea was to make pizza dough and make finger-shaped mini pizzas, but I felt that this was too heavy for our lunch so I used tortillas instead. I spend some passata over the tortillas, sprinkled on some grated cheese and popped them under the grill. While the cheese was melting I cut some peppers into small triangles. Once the cheese was melted I cut the tortilla into strips, made one end into a point and pressed a pepper triangle into the tip to resemble a fingernail.
I think if I had made pizza dough rather than use tortillas this would have been neater and more effective. Also if I had used a green pepper for the fingernail rather than yellow then it would have stood out more. They were still tasty and Robbie though they were fun.
Snake Cheese Twist – ingredients: cheese twist, peppers, tomato puree.

This idea again called for you to make bread twists and shape them into a snake, but I decided to include these in our day too late to do this so just used shop-bought cheese twists instead. It meant that they were again a bit rough around the edges, but still fun. I used a dot of tomato puree for eyes and some chopped up slices of pepper as a tongue.
Chocolate Witches Fingers – ingredients: chocolate finger biscuits, peanuts (or an alternative for fingernails – you could use breakfast cereal)
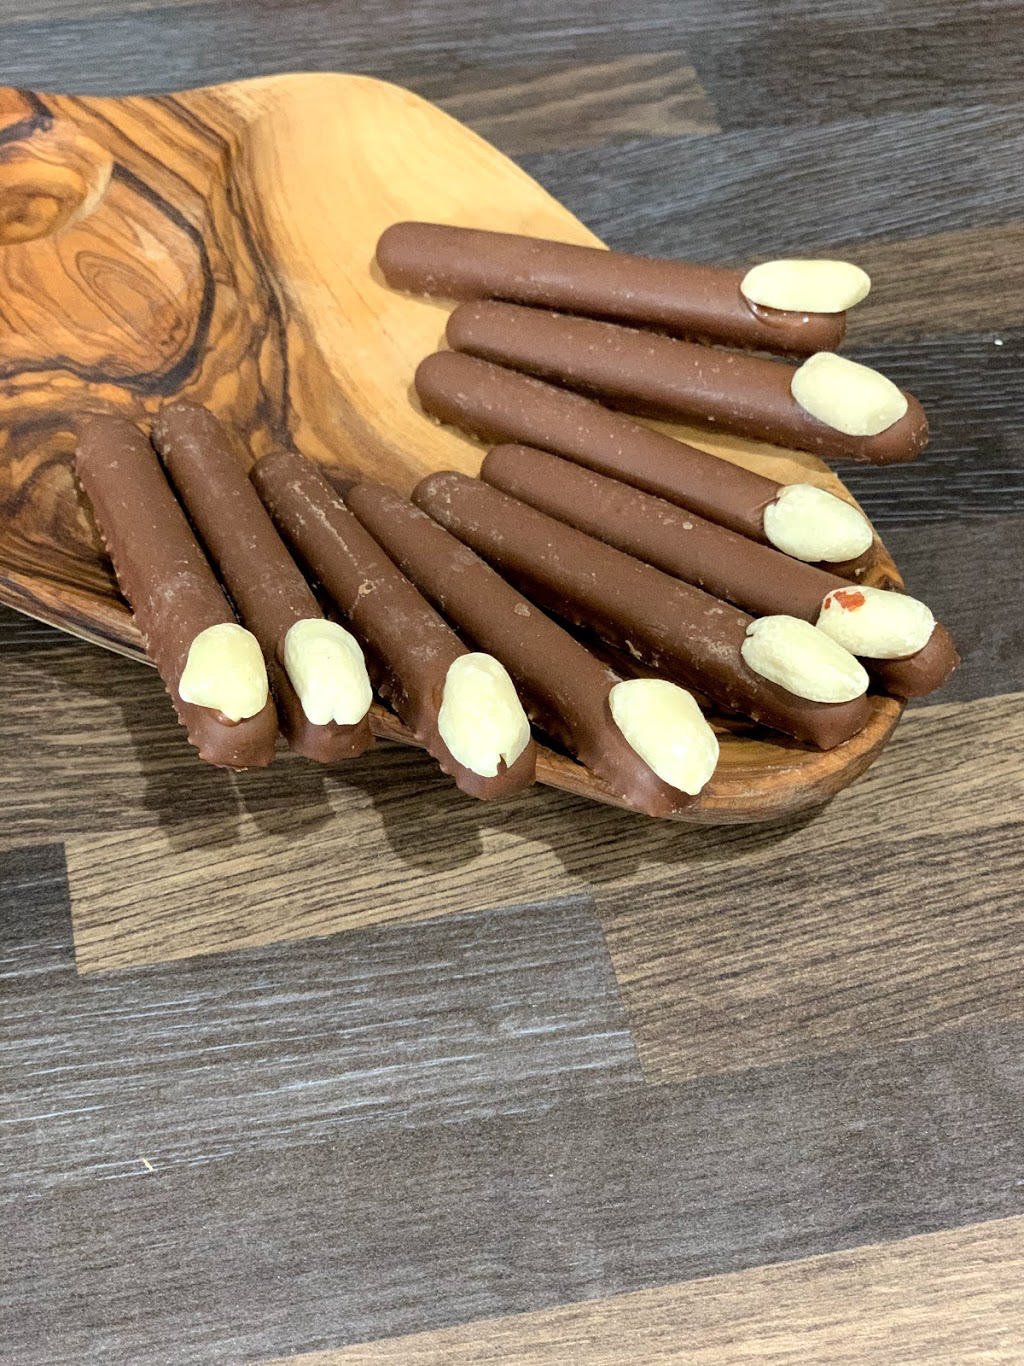
These were fun to have as a snack during our Halloween day and super easy to make. I halted some peanuts, then used a match to melt the chocolate at one end of the finger biscuit. Once the chocolate was melted I stuck a half peanut onto the melted chocolate and set them aside to set.
Sausage “Mummy” Rolls – ingredients: sausages, puff pastry.
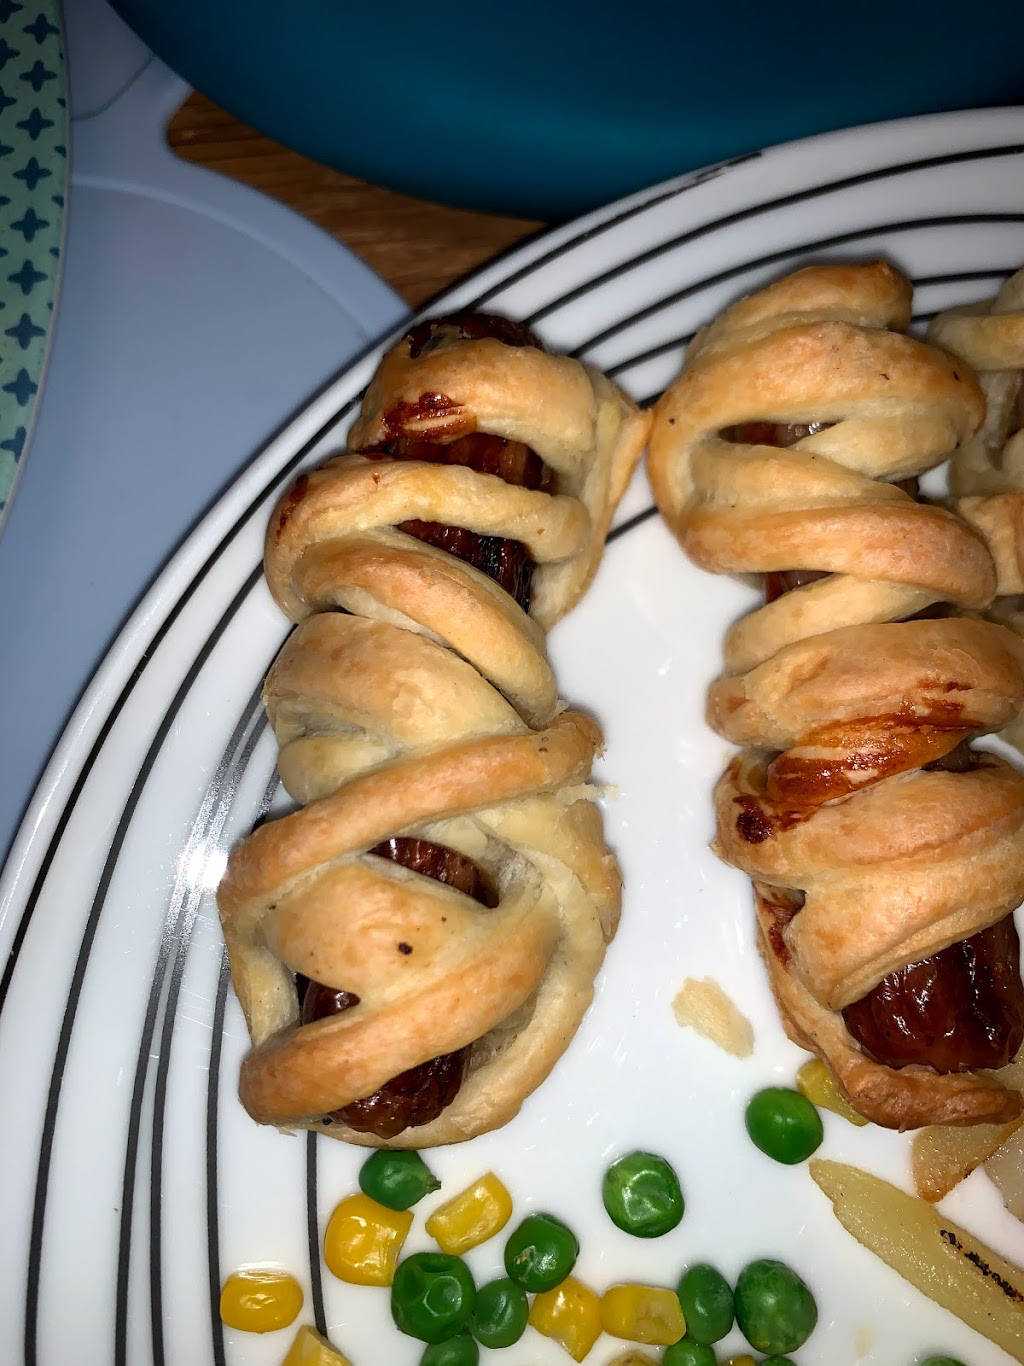
I was really excited to make these for our dinner on Halloween. I have a bit of a fear of undercooked meat so I cooked the sausages first on our George Forman Grill. Once they were cooked I cut think slices of ready-made puff pastry and wrapped them around the sausages. I then cooked the fully assembled “Mummies” in the oven in line with cookie instructions for the Pastry.
I would have loved to give these wee guys eyes, but I couldn’t think how to do this effectively.
